Wednesday, December 15, 2010

Raincoat Girl Turntable

I'm done with my character model! Until I can think of a better name, I'm just calling her "Raincoat Girl" :p

Here's a still:


Getting the hair and cloth sims to work right took aaaggggeeesssss. Thank goodness Marissa Krupen knows so much and helped me out a lot. :)

I wound up cheating on the subsurface scatter for the skin. I couldn't get it to look right on its own, so I wound up using a layered shader with the subsurface on one layer and a normal texture map on the other layer. I think the end result looks okay.

Turntable!

Raincoat Girl from Karl Li on Vimeo.


I'll post more stills later, but now I really need to study for that Finance final that I've been avoiding. >< I also have to make an environment for my character to go in to, and I still have that final project for 3D modeling to finish (I haven't even started...).

Sunday, December 12, 2010

Character Model Face

Okay, I'm close to finished with the face...


I've decided not to give her eyelashes. They didn't look very good. I also noticed that in some Pixar characters, Pixar chose to keep the lips the same color as the rest of the skin... I kind of like that style choice, so I'm going to steal it (read: Karl is too lazy to paint lips). :p

Saturday, December 11, 2010

Character Modeling In-Progress Render

I've finally got hair, skin, and eyes in a somewhat presentable form. They still need a LOT of tweaking though. I also still have to add teeth, eyebrows, and eyelashes. Also, nothing is rigged yet, hence the creepy blank expression...


As for my final project... I have no idea what I want to do ><. I'm thinking about maybe an old fashioned train station or something... that would be kinda cool.

Saturday, December 4, 2010

Cloth Simulation Progress

I'm working on a character model right now loosely based on this sketch . Here's how the cloth simulation stuff is looking right now:


There is still much work to be done.

Monday, November 29, 2010

Ink Tree Drawing

I have a pretty sizeable backlog of things from the Drawing class I took over the summer, so I'm going to start posting a few things from over the summer each week.

One homework assignment we had was to do an environmental drawing with ink. I did a tree based on a photo I took at Peace Valley Park.


An amusing sidenote: for large format things, I usually depend on decent lighting and my Nikon D60, but this particular drawing was small enough that I decided to try using a large format scanner with it. Even with a giant large format scanner though, I ended up having to scan it in four segments and then stitch the segments in Photoshop. Photoshop is good at auto-stitching!

Friday, November 19, 2010

City Street: Playing with Z-Depth and Ambient Occlusion

I haven't managed to make any progress on actually finishing this project since my last post, but I have had a bit of time to play with ambient occlusion and z-depth mapping. So... same render as before, but now with depth of field and some ambient occlusion:


...and the z-depth map:


...and the ambient occlusion map. I did the leaves on the trees by transparency mapping the planes where the leaves went on the model, but because of that I wasn't sure how I was supposed to ambient occlude the trees. So I removed them for the ambient occlusion map:


I actually found an alternate way to render out the z-depth map, but I'm not entirely sure this is as physically accurate as the standard way Maya does z-depth:


Hopefully more soon!

Wednesday, November 17, 2010

City Street Progress

I've been working on a little city street for a few days now. I want to capture the kind of old European feel that one can find in places like Edinburgh.

Right now this is about 65% done. I think I'm going to try to make it look like an old postcard.

Monday, November 8, 2010

Clock Miniproject

Over the weekend I decided to do a little mini-project to try out some new tricks I've learned with rendering. I decided to try to make as photorealistic of an image as possible of a clock. Here's what I came up with:


The clock face is noticeably pixelated; I'm not entirely sure why that is. For some reason Mental Ray is not sampling the texture file at a very high frequency, I'll work on that next I suppose.

A little breakdown video of the compositing that went into the clock:

Clock Rendering/Compositing Breakdown from Karl Li on Vimeo.

Saturday, November 6, 2010

Hermit Crab

The hermit crab is complete!

Hermit Crab Redux from Karl Li on Vimeo.


Modeled in Maya, textured in Mudbox, rendered with MentalRay.

I'm perfectly aware that no hermit crab would ever actually live in a conch shell that large, but I thought the image of a small crab in a huge shell was amusing.

Some stills from some different angles...


As the title "redux" suggests, the crab above is actually the second version of the hermit crab I've made. I originally finished about a week earlier with a different version, but then after getting some suggestions from Professor Scott White, my 3D modeling professor, I decided to redesign the conch shell. Here's what Hermit Crab Mark I looked like:

Hermit Crab from Karl Li on Vimeo.


I actually still want to change some things. If I have time, I'm going to go back and change the displacement mapping on the conch to get the groves to all go in a more uniform direction. Also 9 seconds into the turntable, you might notice there's a slight shiny spot on the conch. That's a mistake I made in the specular map that I definitely want to fix. I also want to try placing some small low intensity lights really close to the crab's eyes to bring out the gloss that's visible in the Mark I crab. In the Mark II crab, the shadow from the flaring part of the conch makes the crab's eyes look matte. The crab's claws need some color tweaking as well; the color doesn't quite perfectly match the rest of the crab.

The DMD director, Amy Calhoun, told me that no modeler is ever satisfied with a model. So true. :p

Sunday, October 31, 2010

Hermit Crab Ready For Texturing!

My hermit crab is ready for texturing and lighting and rendering! I'm going with Mudbox for texture painting for sure. I'm still not entirely sure how I'm going to get all the prickly parts of the legs done... I'll probably just do a displacement map or something.


Thursday, October 28, 2010

Hermit Crab Progress

I'm working on a hermit crab in 3D Modeling class! The shell was really hard to make... I wound up making a small segment, duplicating special it, and then stitching all the segments together by hand. :p So... the crab itself is only some legs right now. I have a lot of work to do on this still... sigh.

I'm thinking about trying Mudbox for texturing this thing. The UVs on the shell aren't pretty, and I don't want to spend a gazillion hours unwrapping those UVs.... o_0

More later.


Saturday, October 23, 2010

Puddle! Redux

Ana suggested a few changes. Much credit to her, the painting looks much much better now:


I also played with giving the girl goggles of some sort and a snorkel, but I'm not sure this idea works so well.


Puddle!


I felt like painting (in Photoshop) today. I'm pretty happy with how this one turned out. :)

Monday, October 18, 2010

Little Kiddo

In Penn's SIGGRAPH chapter, we're spending the next few months designing our own little characters in Maya!

I drew a little girl complete with little kid size coat and rubber rain boots:


I don't really have any idea yet of what kind of adventure she'll go on. I'll figure that out as I go along, I suppose. I picked a little kiddo mainly because I love how crazy exaggerated little kids often make their expressions. Just check out the absolutely beautifully animated short Playing with light - Mon ami le robot.

More later!

Saturday, October 2, 2010

likimmun.

Ana Kim, Sarah Mun, and I are starting a joint daily photoblog! Each day all three of us upload a photo to the site. We're supposed to try to post recently taken photos, but tapping into our older shots is okay too as long as the shot being posted hasn't been published before. The site is running on a modified version of the Omjii engine.

So every day, three photos by the three of us.

I'm really excited. Why don't you take a look?

Bonus: This is the photo we used for the site teaser:


It's one of my dad's old lenses. :)

Wednesday, September 29, 2010

Give Gifi!

A few weeks ago I joined a startup founded by a few Penn alums called Venmo! My project at Venmo for the past few weeks has been helping my friend and co-worker, Ayaka Nonaka, with a new app from Venmo called Gifi, which is a Foursquare/Venmo mashup that lets people leave Venmo money at geographic locations. I've been working on Gifi's website and overall look. Here's some of the artwork I did for Gifi:


Saturday, July 10, 2010

Playing with Maya

I've been playing with Maya for the past few months. 3D animation is a direction I'd like to start moving in. :)

I'm starting to get the hang of lighting things and whatnot, although I still do not know much. I'm taking a 3D modeling course in the fall, hopefully I'll get much better by then.

Some glasses and strawberries and grapes on a table:


A Table With Some Stuff from Karl Li on Vimeo.

Tuesday, July 6, 2010

Exposure Fusion Experiments

Recently I've been experimenting with exposure fusion, a new technique that is sort of like HDR, but not HDR. After a week of experimenting, I've decided I prefer exposure fusion to HDR, mainly because there's no messy tone-mapping involved, which means... less of a chance for people to really screw up the photos. HDR done right looks really good, but when people do HDR for the sake of HDR, things get overdone really fast. ><

These were taken through the course of the week throughout the University City area, at various points on the R5 train to Lansdale, and at home. Everything that isn't flowers was shot on my iPhone, everything that is flowers was shot with my Nikon D60.

The Penn Bookstore:


Waiting for the R5 at 30th Street Station:


North Broad Station:


Pennlyn Station:


That bank on North Wales Road near Assi:


Some random bushes. Check the geotagged GPS coordinates in the EXIF data (all of these photos are- and all of my photos from now on will be- geotagged) if you care to know where this was taken.


An orchid of some sort. With these shots I added an exposure with flash to the mix of exposures that went into the fusion process.


Monday, June 28, 2010

Photos On The Go

I got the iPhone 4 over the weekend. One of the most widely anticipated new features in the iPhone 4 that I've been looking forward to the most is the new 5 megapixel, backlit camera with LED flash. Obviously 5 megapixels is quite a bit less than the 8 megapixels you can find on the HTC Droid Incredible or HTC Evo 4G or Motorola Droid X, but as any person remotely interested in photography should know, megapixel count is actually not very relevant to how good the photos the camera takes look. I've spent a few days playing with the iPhone 4's camera, and I'm confident in saying it's hands down the best cellphone camera ever made. Heck, it's better than the vast majority of dedicated point and shoots on the market. It's obviously still not as good as my trust Nikon D60 DSLR, but for everyday purposes, the iPhone 4's camera is more then enough.
Here are some photos I took throughout a day. Except where noted, all photos were imported into Lightroom 3 and resized but not retouched in any way otherwise. In other words, this is how photos come straight out of the iPhone 4's camera.
A basket on the island at home. I'm really impressed with how the iPhone 4 kept the temperature in the foreground nice and warm and kept the background cool.


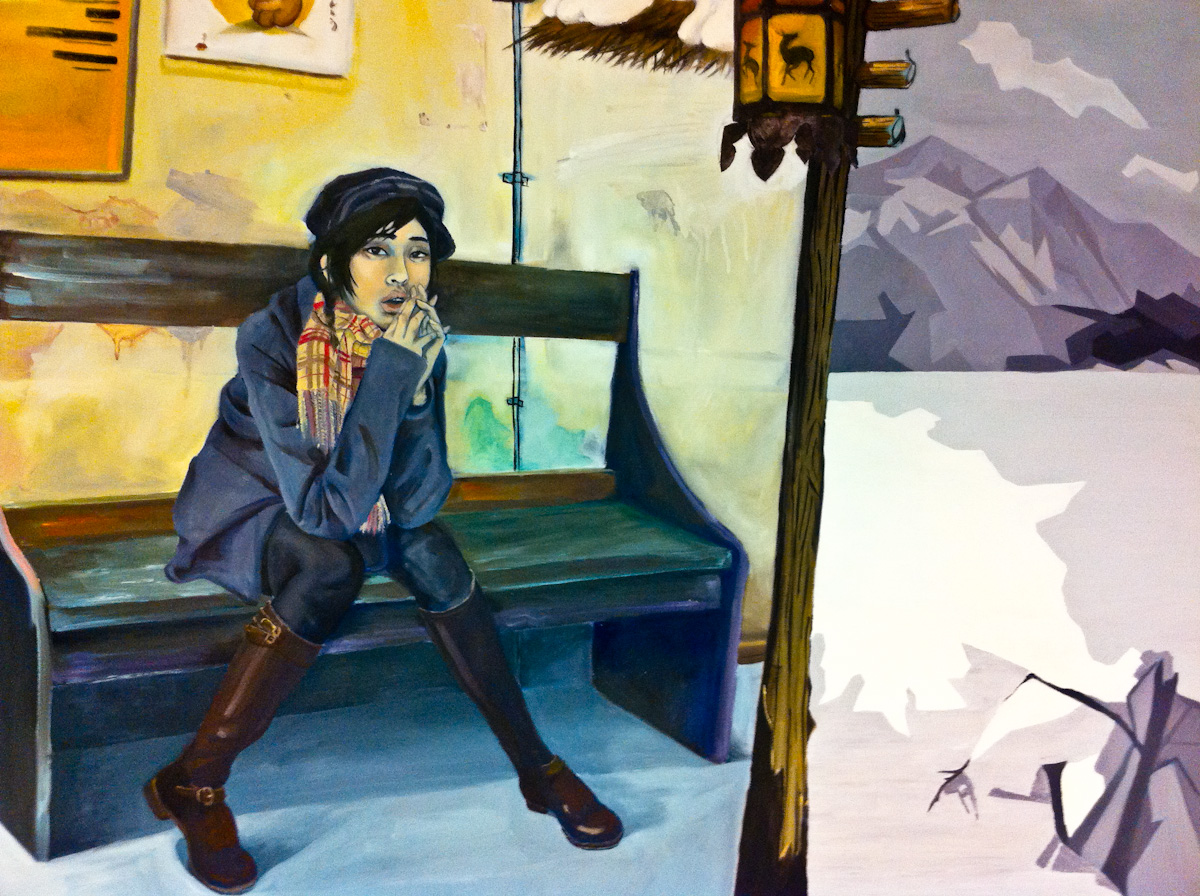
I was really surprised to find that the iPhone 4's camera is actually good enough to serve as a decent art photography camera. The following photo is a photo of a large painting on the wall in a hallway in Addams Fine Arts Hall outside of our Drawing 1 class studio. The colors are more or less dead on:


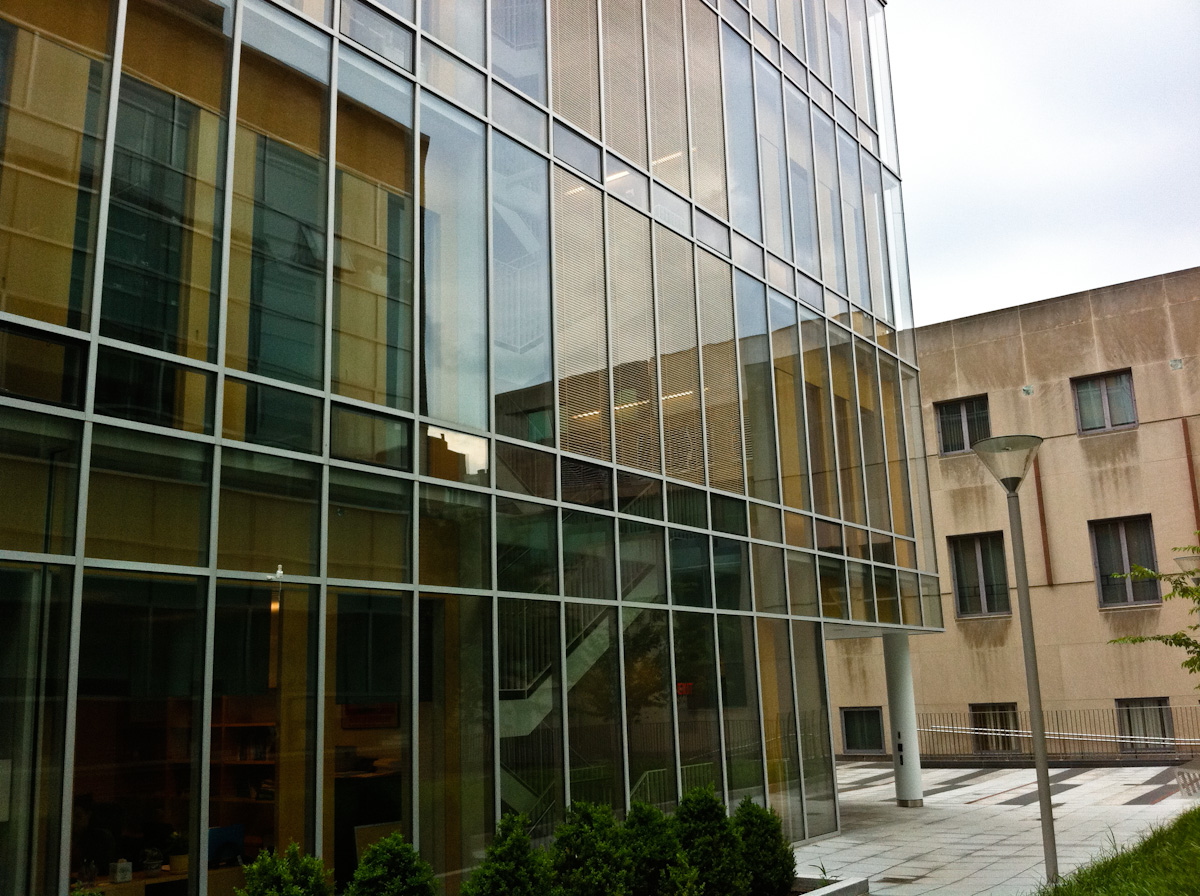
A shot outside Addams Hall facing the Annenberg Public Policy Center's glass facade:


Bicycles outside of Addams Hall:


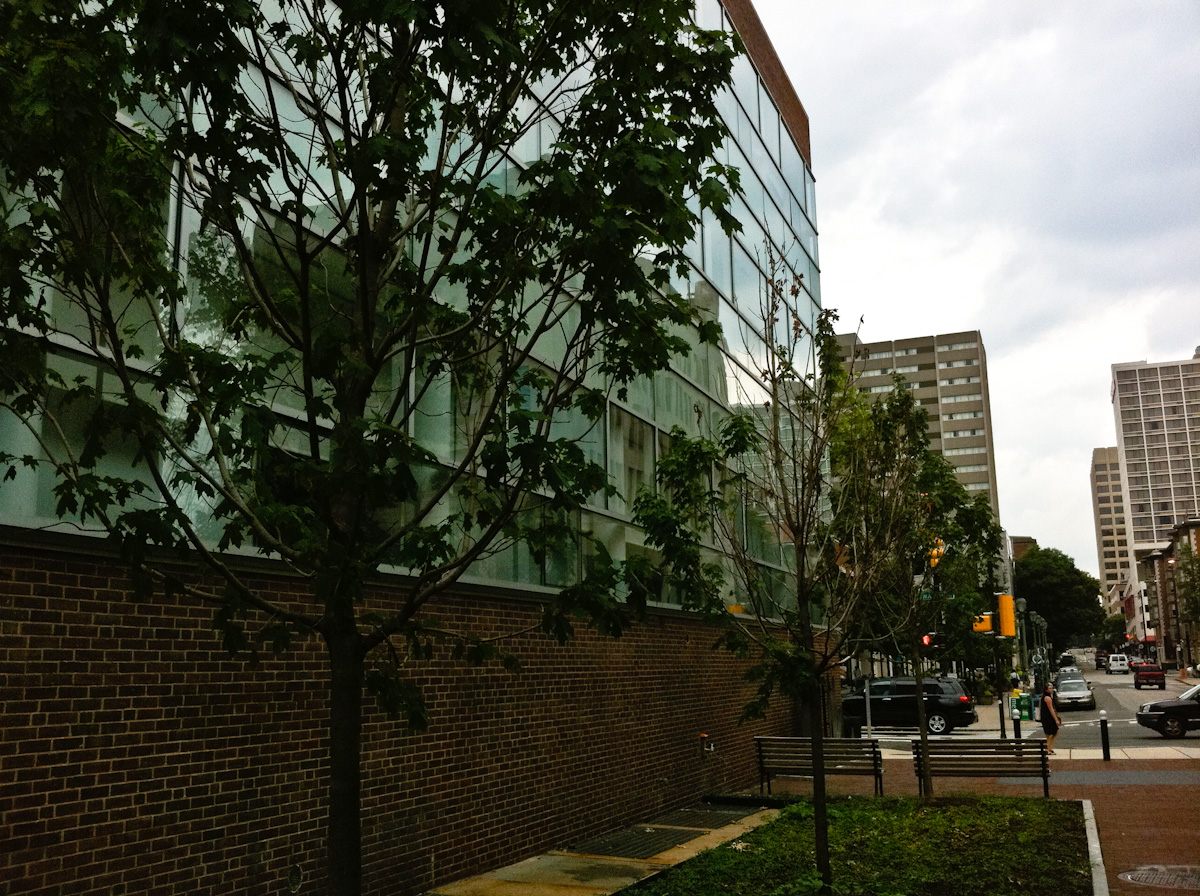
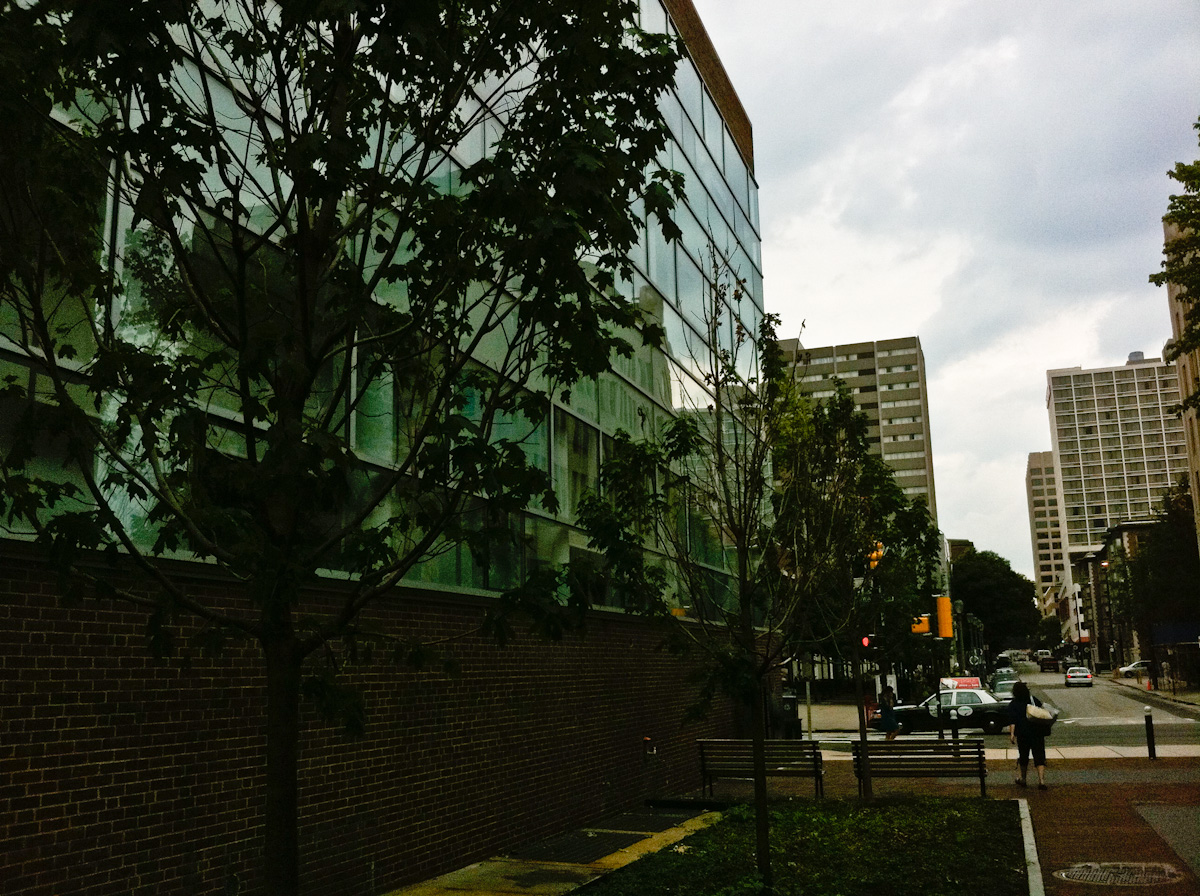
One really nifty feature in the iPhone 4's camera (this feature was also in the iPhone 3GS) is the ability to tap the screen to arbitrarily pick a point that the camera will calculate appropriate exposure bracketing, focus, and white balance from. The next three photos all show Addams Hall from the same position at the same time of day, but I picked three different points to focus on:


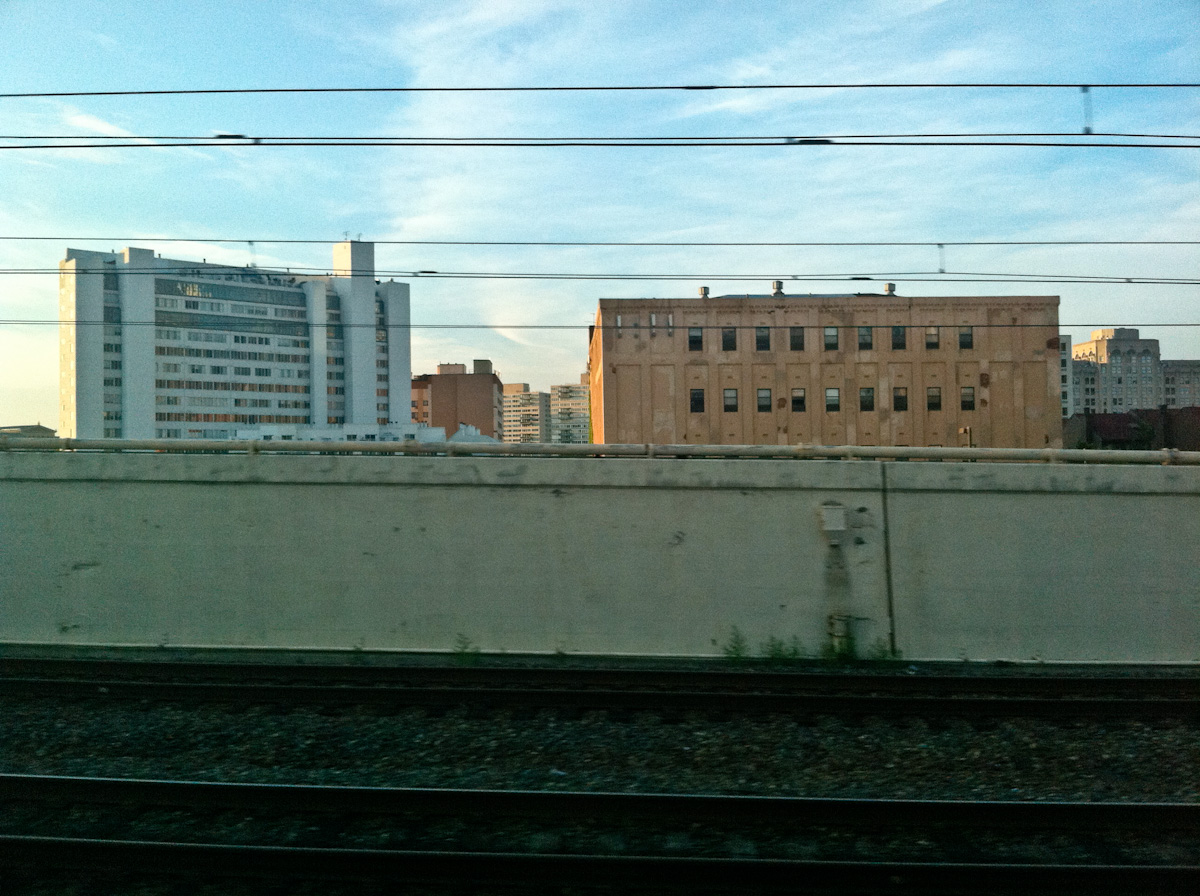
The iPhone 4's camera is really fast too. These shots were taken on the R5 crossing the Susquehanna river leaving 30th Street Station. The train was moving pretty fast, but the iPhone 4 still managed to get these shots without much motion blur:


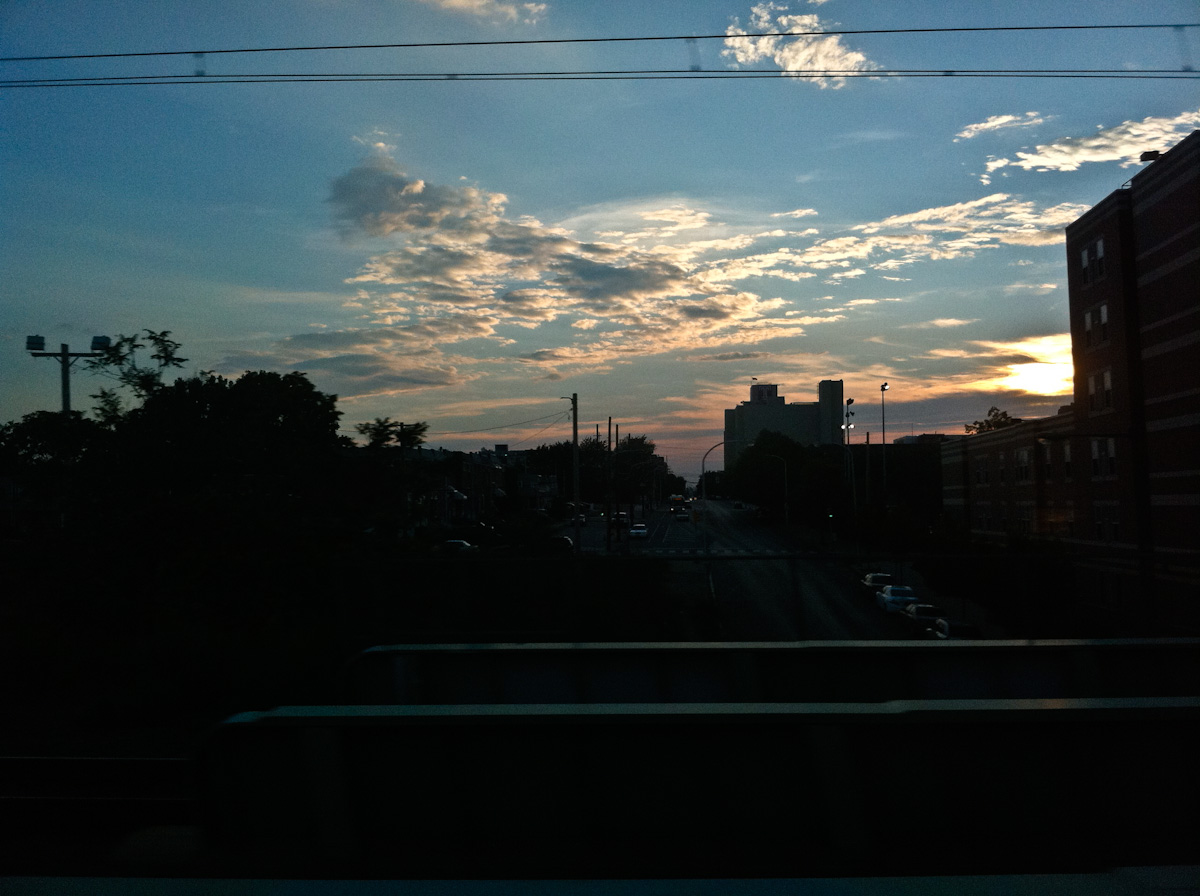
Since you can pick focus points, capturing brilliant skies is really easy with the iPhone 4.


This one is just a neat shot I liked of the glass wall at the Temple R5 station:


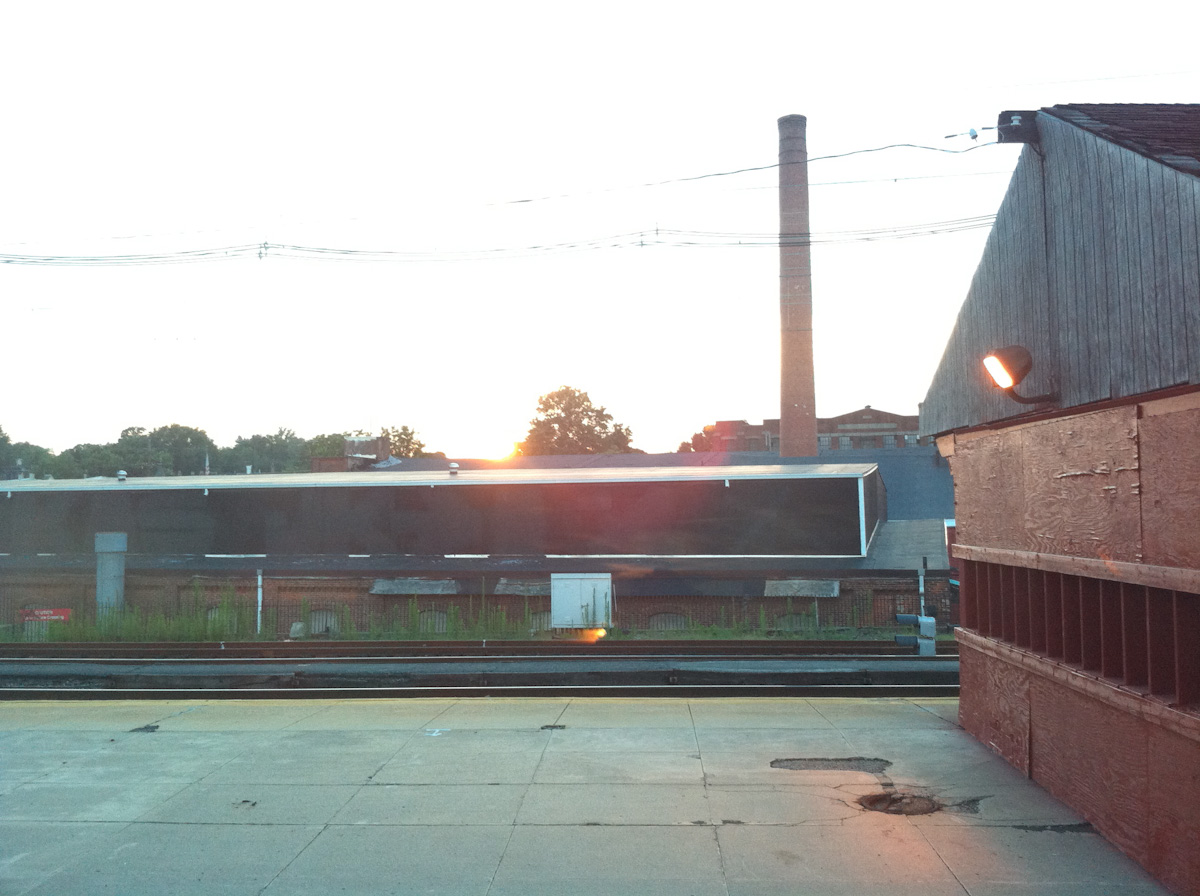
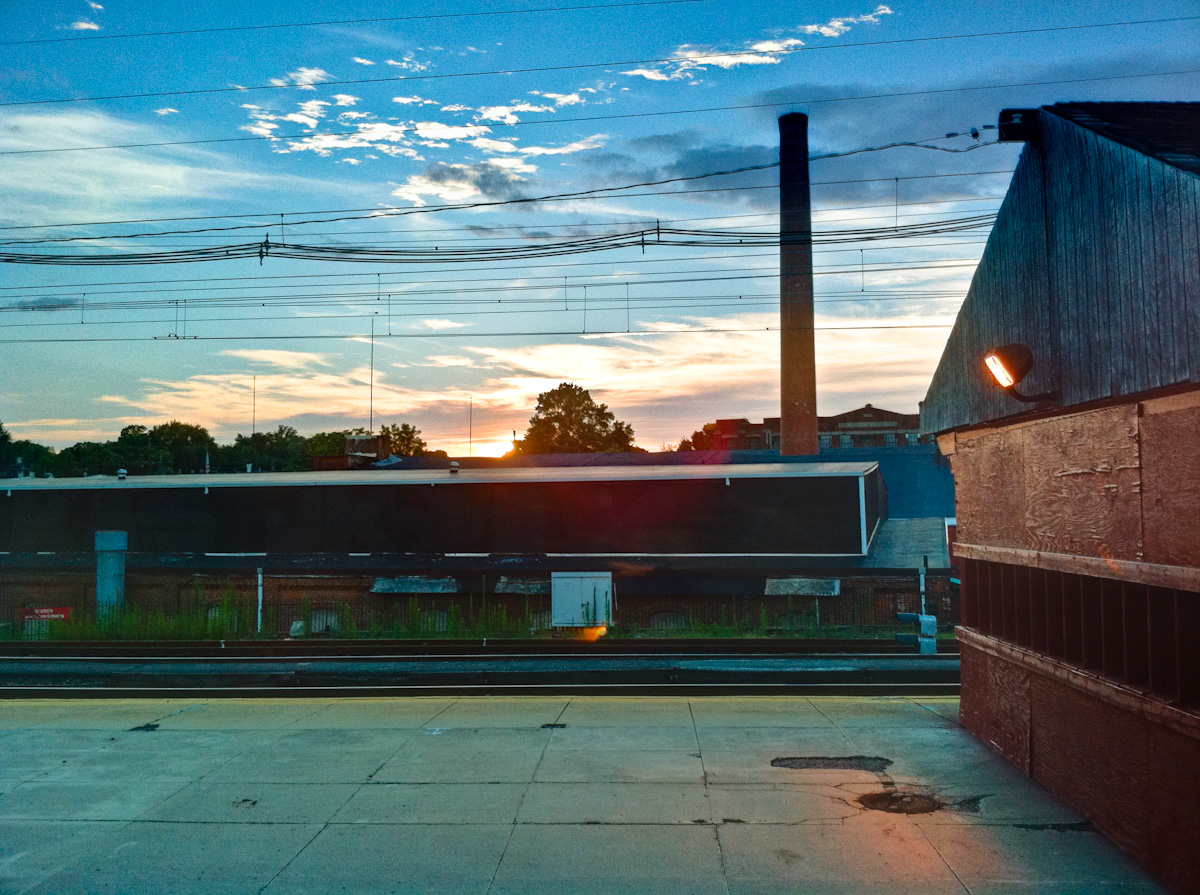
When the train stopped at Wayne Junction, I realized something really neat about tap to focus- since tapping different points to focus also changed the exposure bracketing, the iPhone 4 is effectively a very easy to use HDR camera. Just tap to focus in several different places, and you have a string of shots at different exposures that can be merged to HDR later. Here's two shots of the station at different exposures:


...and then the two shots merged to HDR through Photomatix Pro and tone mapped:


...alternatively, Photomatix Pro has a new Exposure Fusion method of calculating a HDR photo. I actually prefer Exposure Fusion to tone mapping:


All in all, I'm really quite happy with the iPhone 4's camera. I've been looking for a good pocket camera for a while, and I think I've finally found one. The fact that the iPhone 4 can also use the phone's GPS chip to automatically geotag photos is just an even more amazing bonus.


I think I'm going to try following Sarah's example and start posting random camera photos every week. Stay tuned!