I took around 500 pictures while I was in Hong Kong over the summer, but I never really got around to sorting/processing those photos until this weekend. Obviously 500 is too great a sum for any sane person to want to look through here, so instead here are around 35 (give or take a few) shots that Ana Kim helped me pick out.
Almost everything was shot with my Nikon D60; a few shots were taken with my dad's Sony DSC T-100.
Since there's so many pictures in this post, I've split it up into three parts. This is part 2, and here's part 1 and part 2.
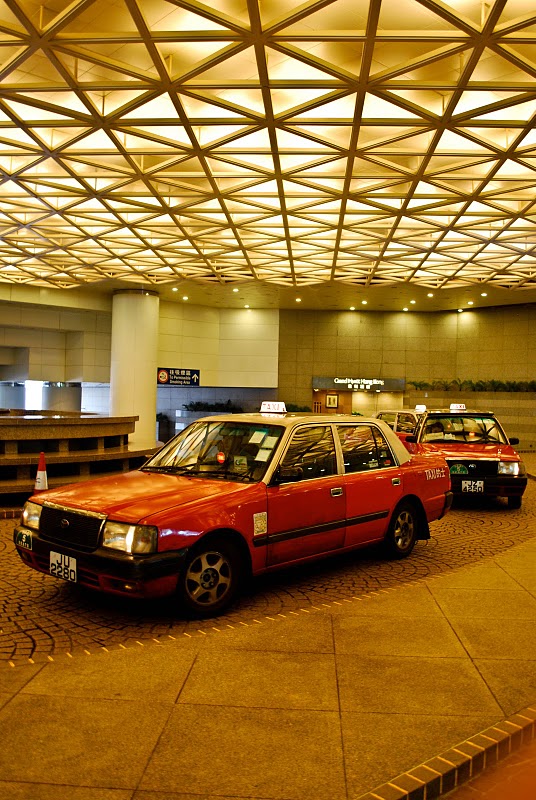
Taxis in Hong Kong are red! They also drive on the wrong side of the road, just like in the UK.
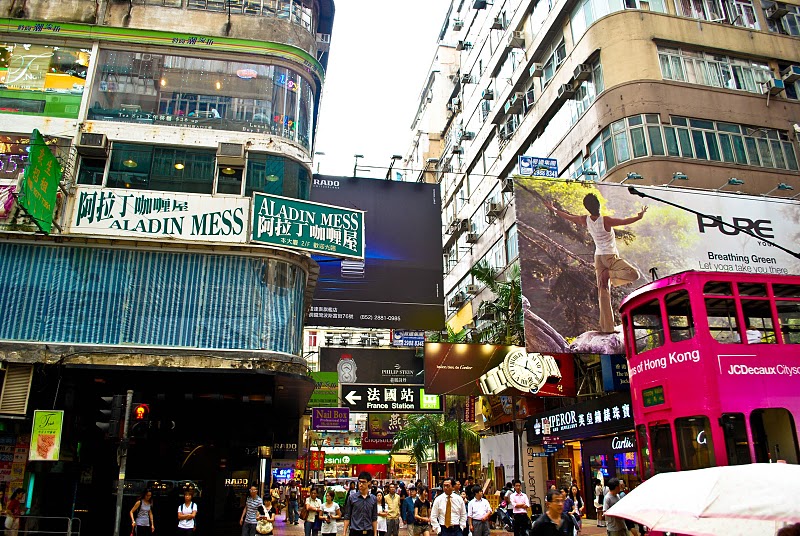
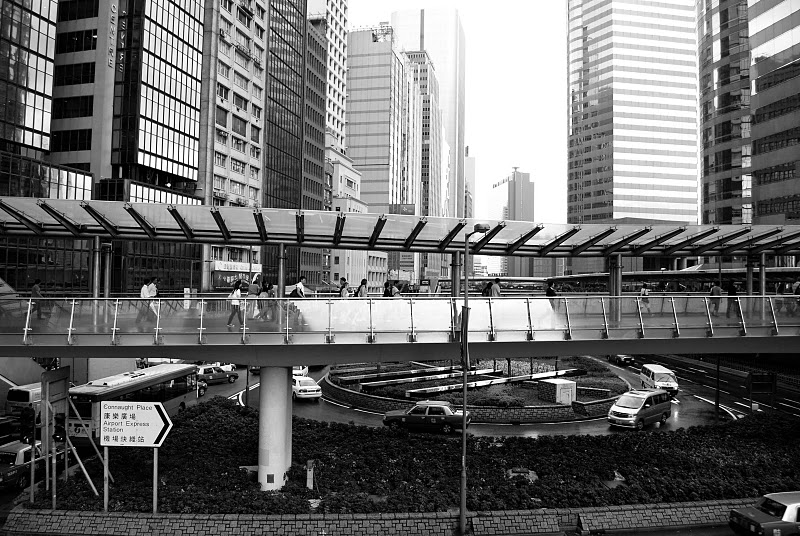
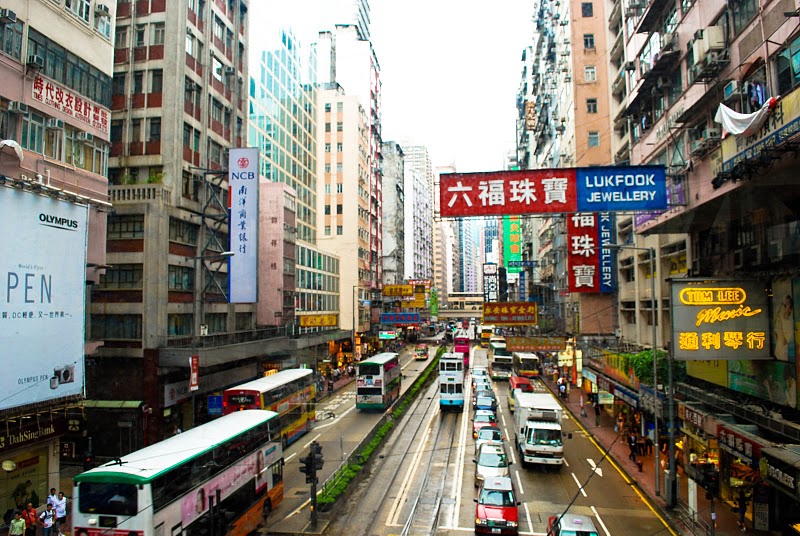
The older parts of Hong Kong are AMAZING to visit, simply because there's so much to see.
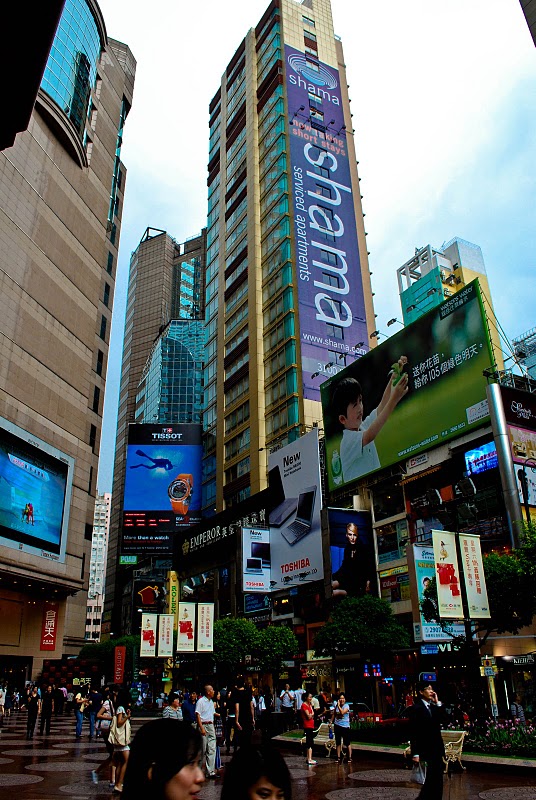
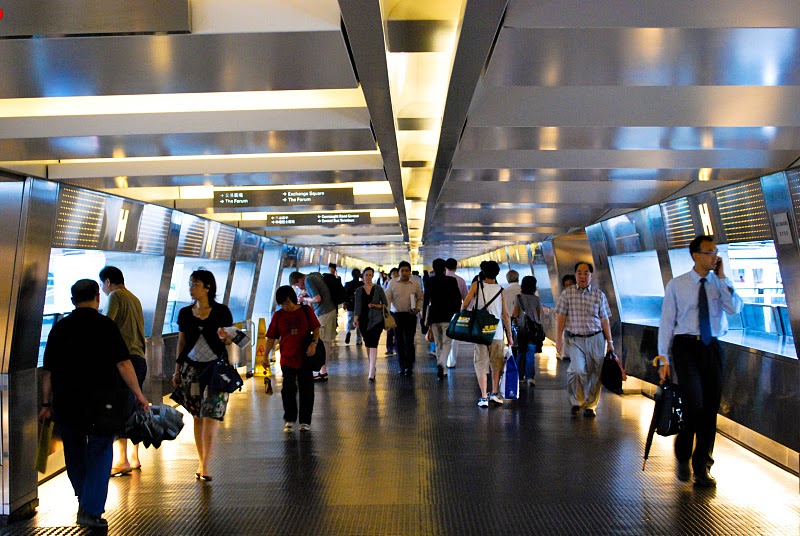
So many people, so many advertisements!
The malls in Hong Kong make the ones back in the US look puny.
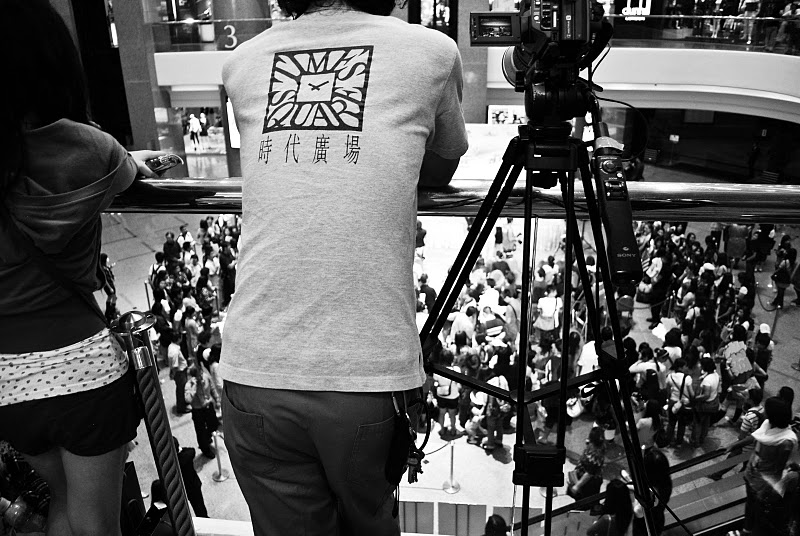
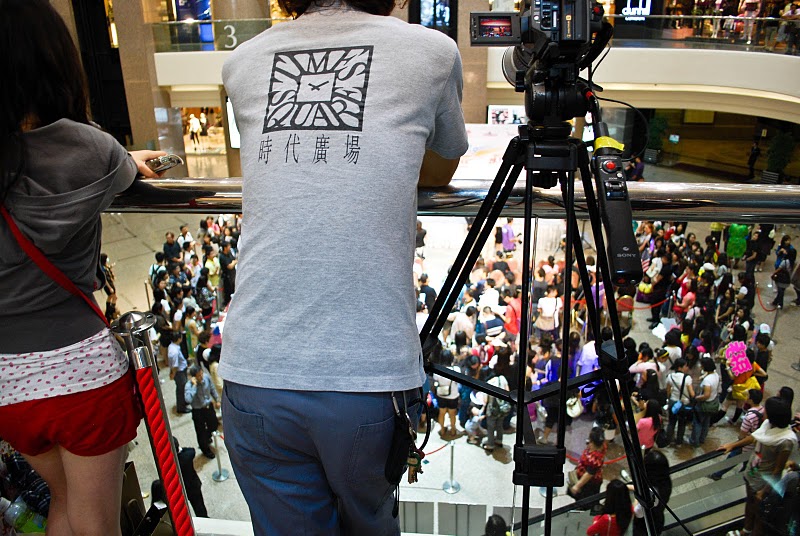
There was some celebrity holding a press conference in this one mall. This guy was videotaping it.
"Times Square" is an odd name for a mall.
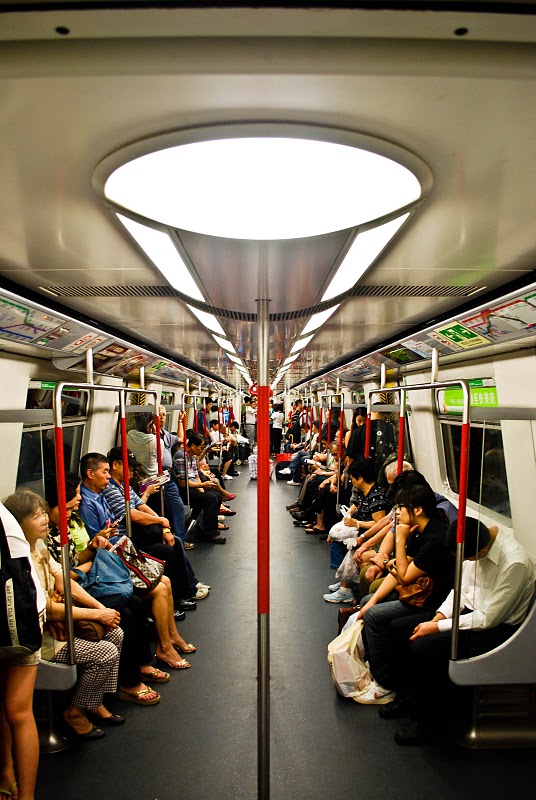
Incredibly, this subway car can be considered relatively empty in Hong Kong. The subways get CRAZY packed during rush hour.
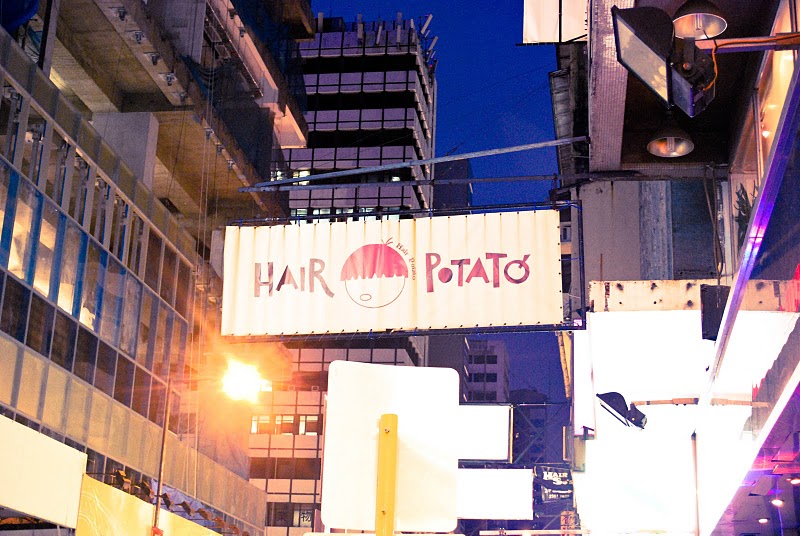
HAIR POTATO! MEEHEE. ^^
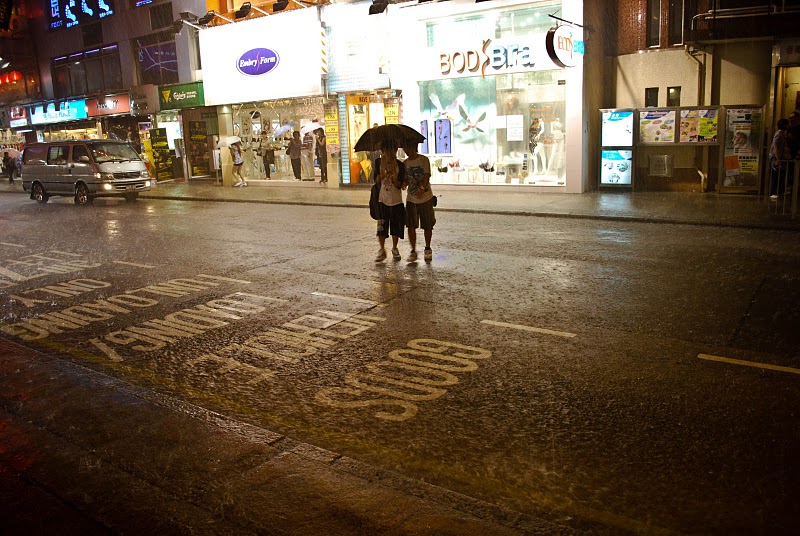
Two random people caught in the downpour from the typhoon.
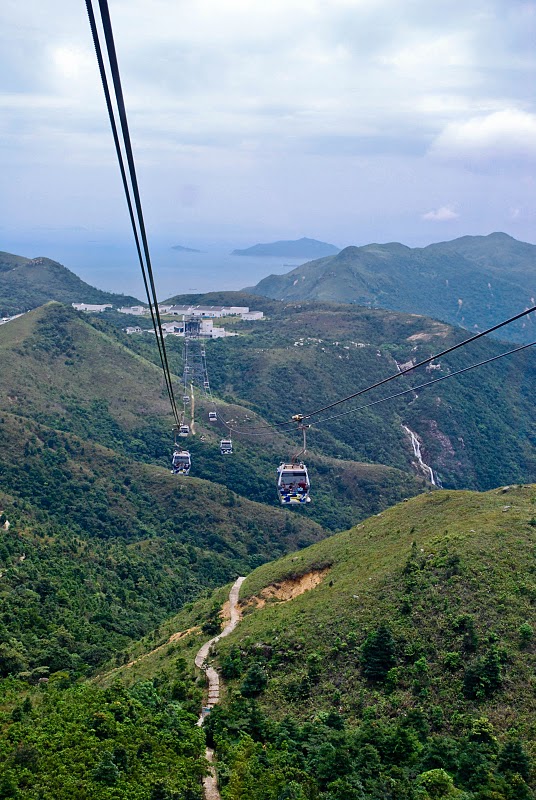
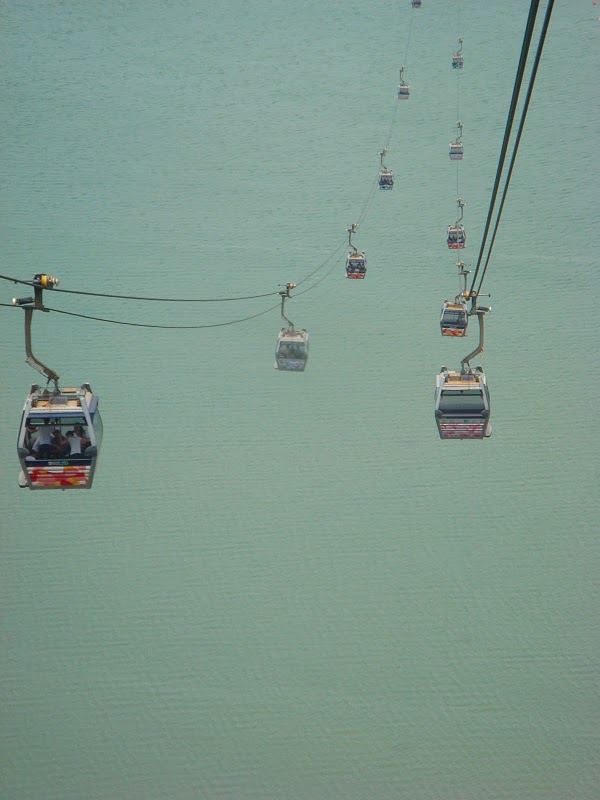
Lantau Island has this mind-bending cable car system.
Ana says this shot doesn't even look real.
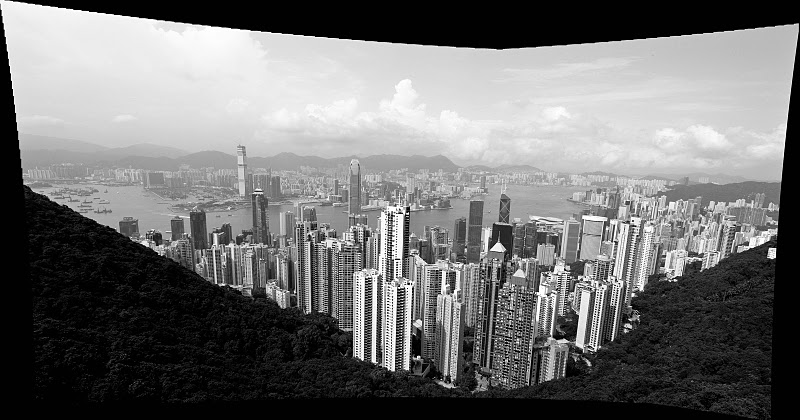
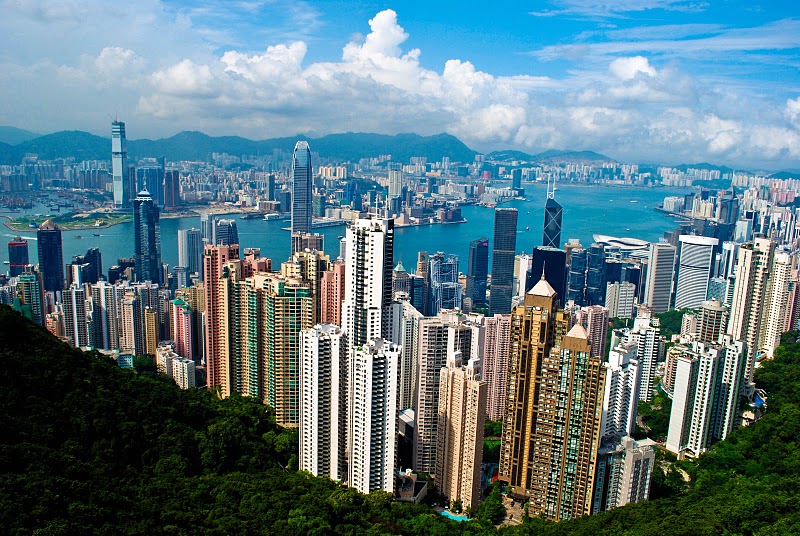
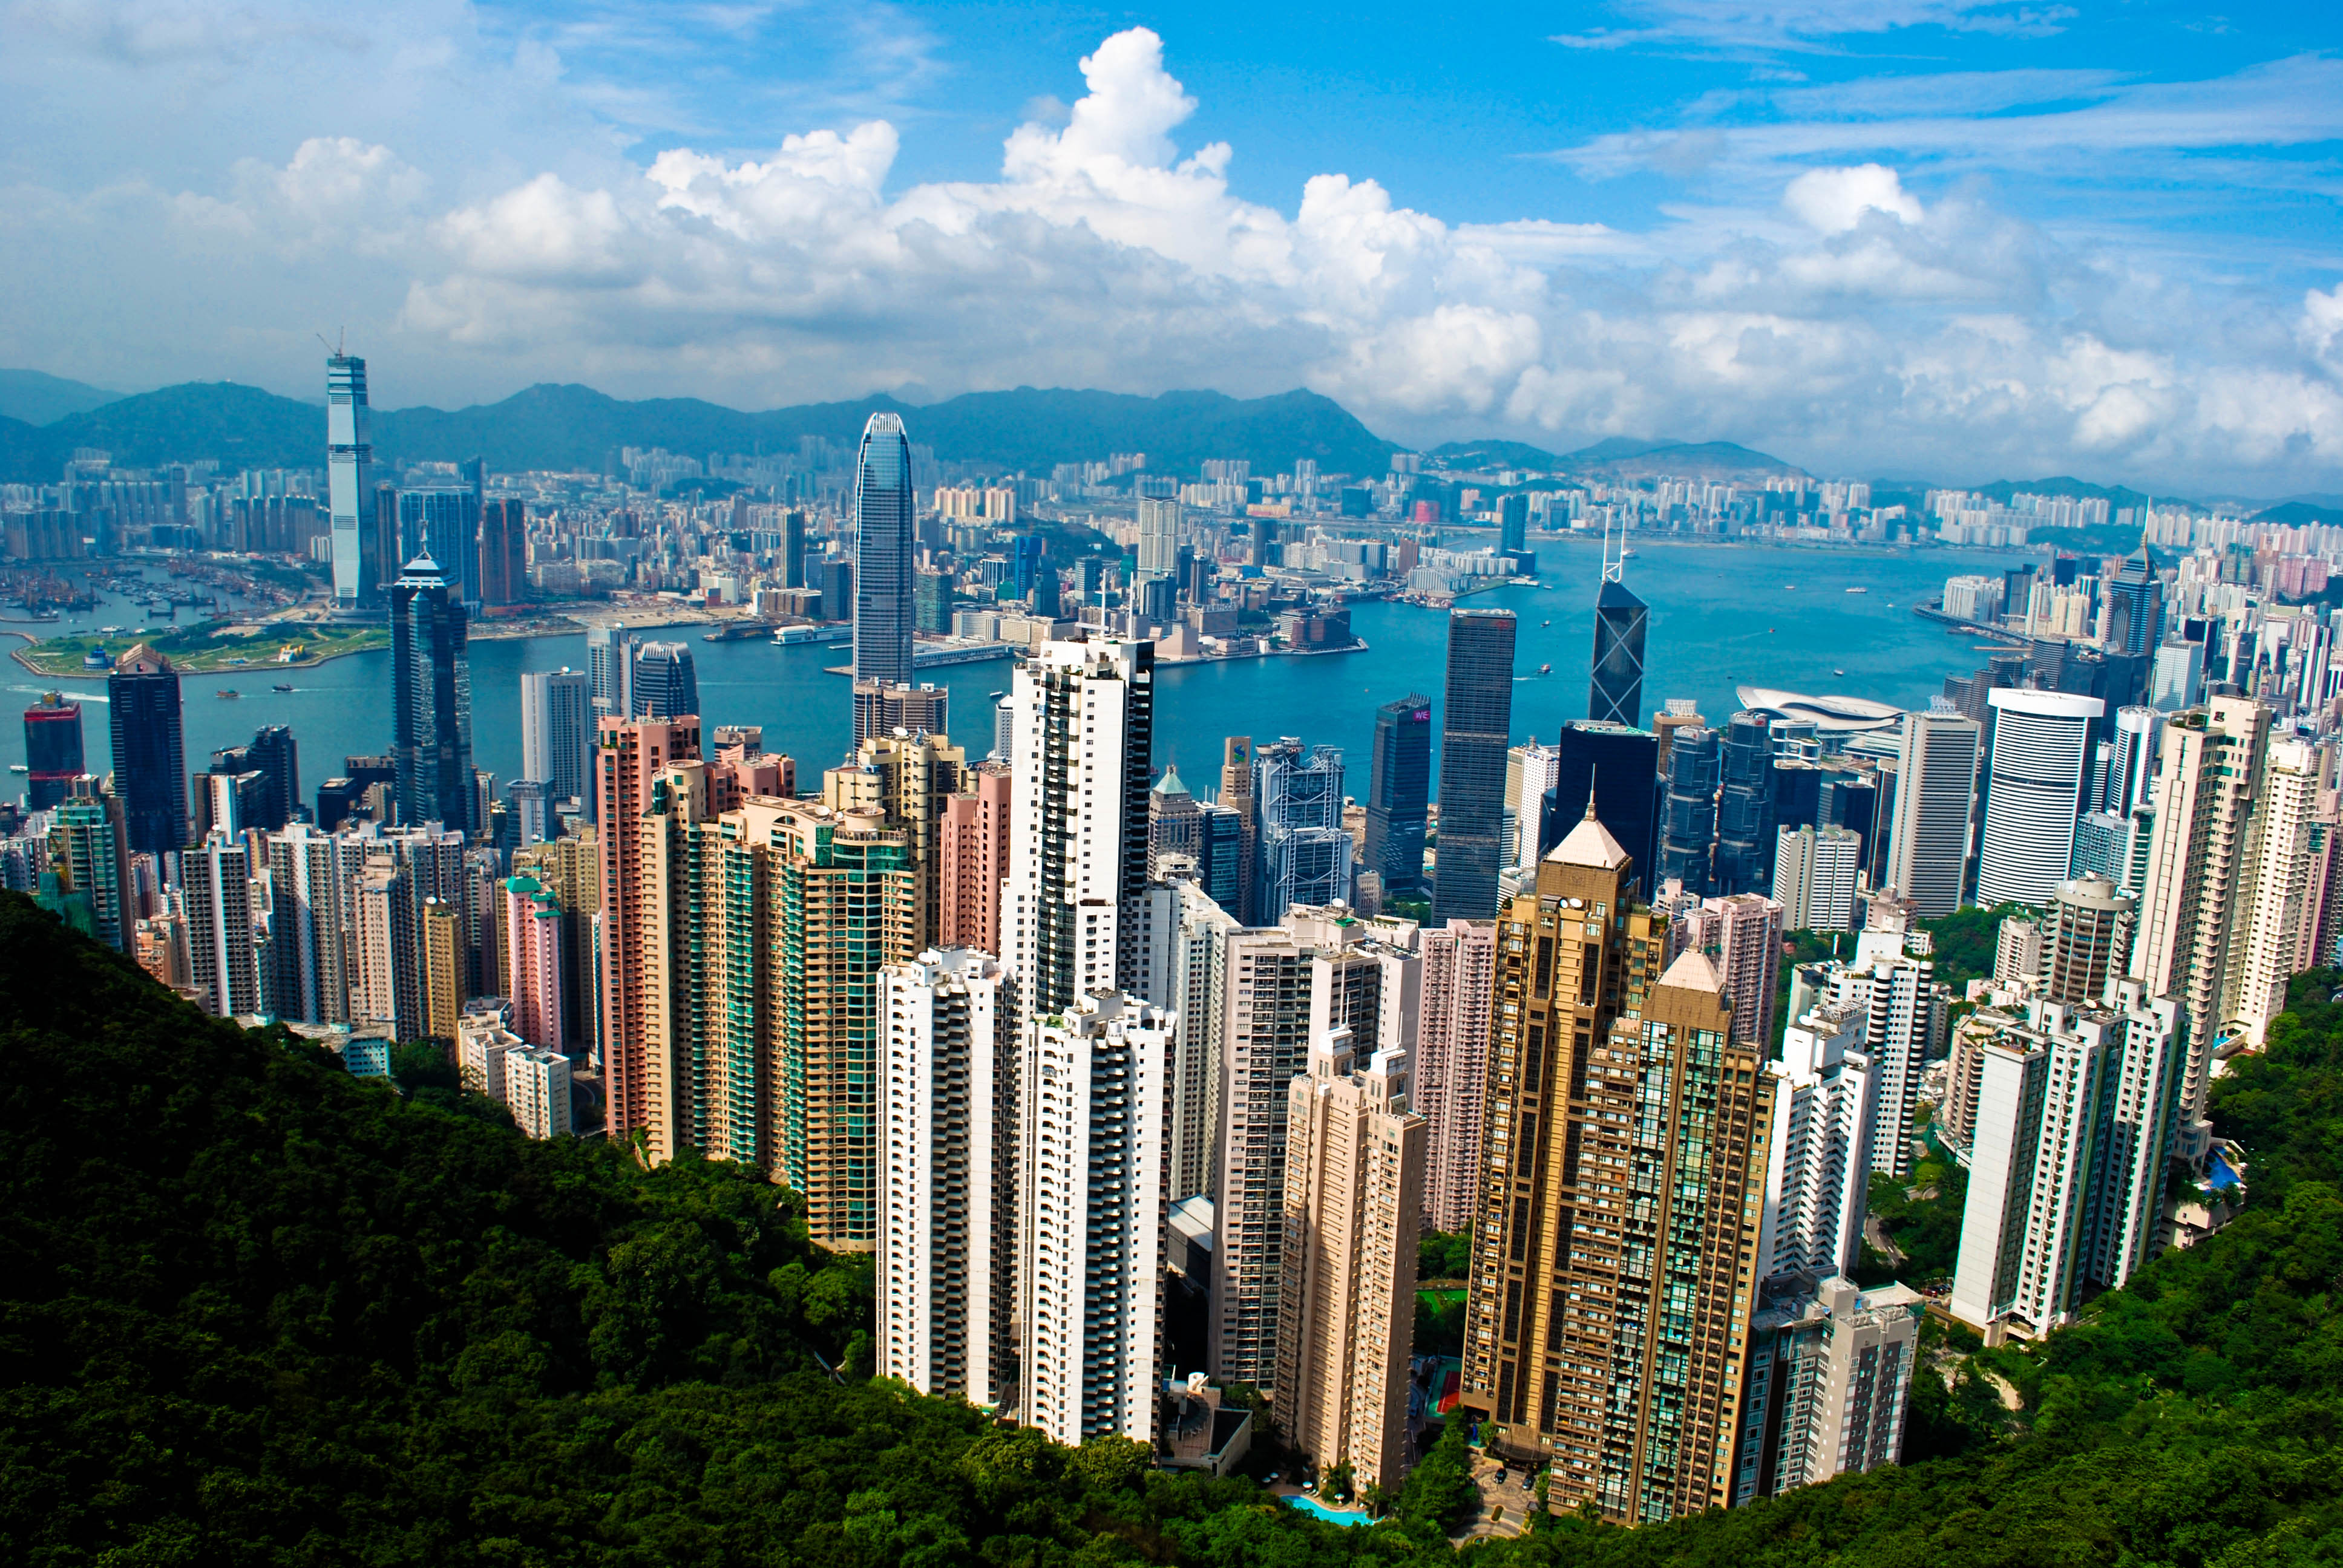
At the top of Victoria Peak, there's this big mall/tower called Peak Tower that offers amazing downward views of Hong Kong's Central Business District. A great place for panoramas!
That really tall blue tower that isn't the under construction one in the far background is International Finance Centre Two. Cool place.
At Dian's request, high res version available here.
Even the apartment buildings in Hong Kong are taller than most skyscrapers in Philadelphia.
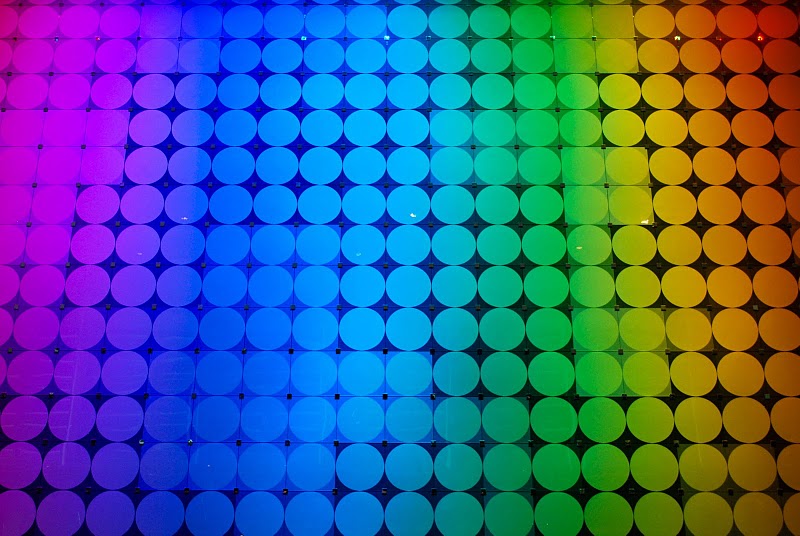
The Hong Kong Convention Center has this crazy amazing rainbow light-up wall thing. I'm using this shot as my desktop wallpaper right now. If you want the full res gigantic file: click here.
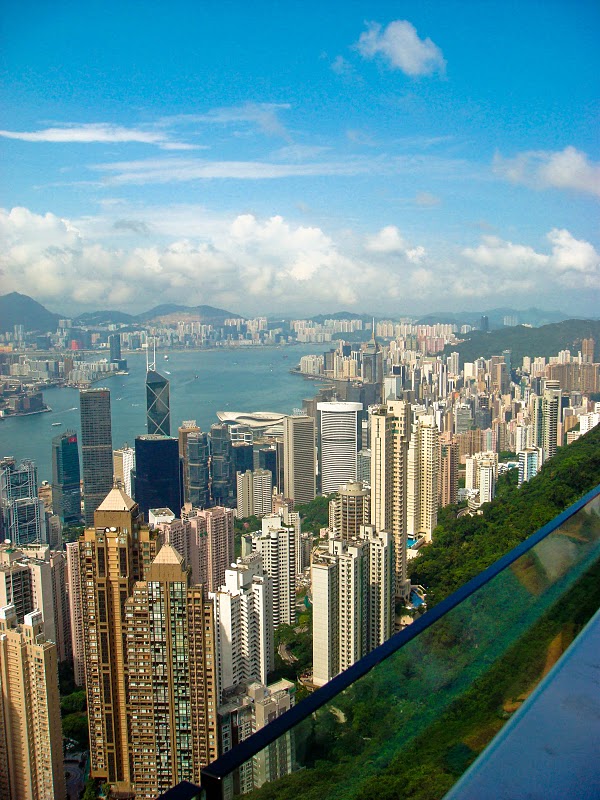
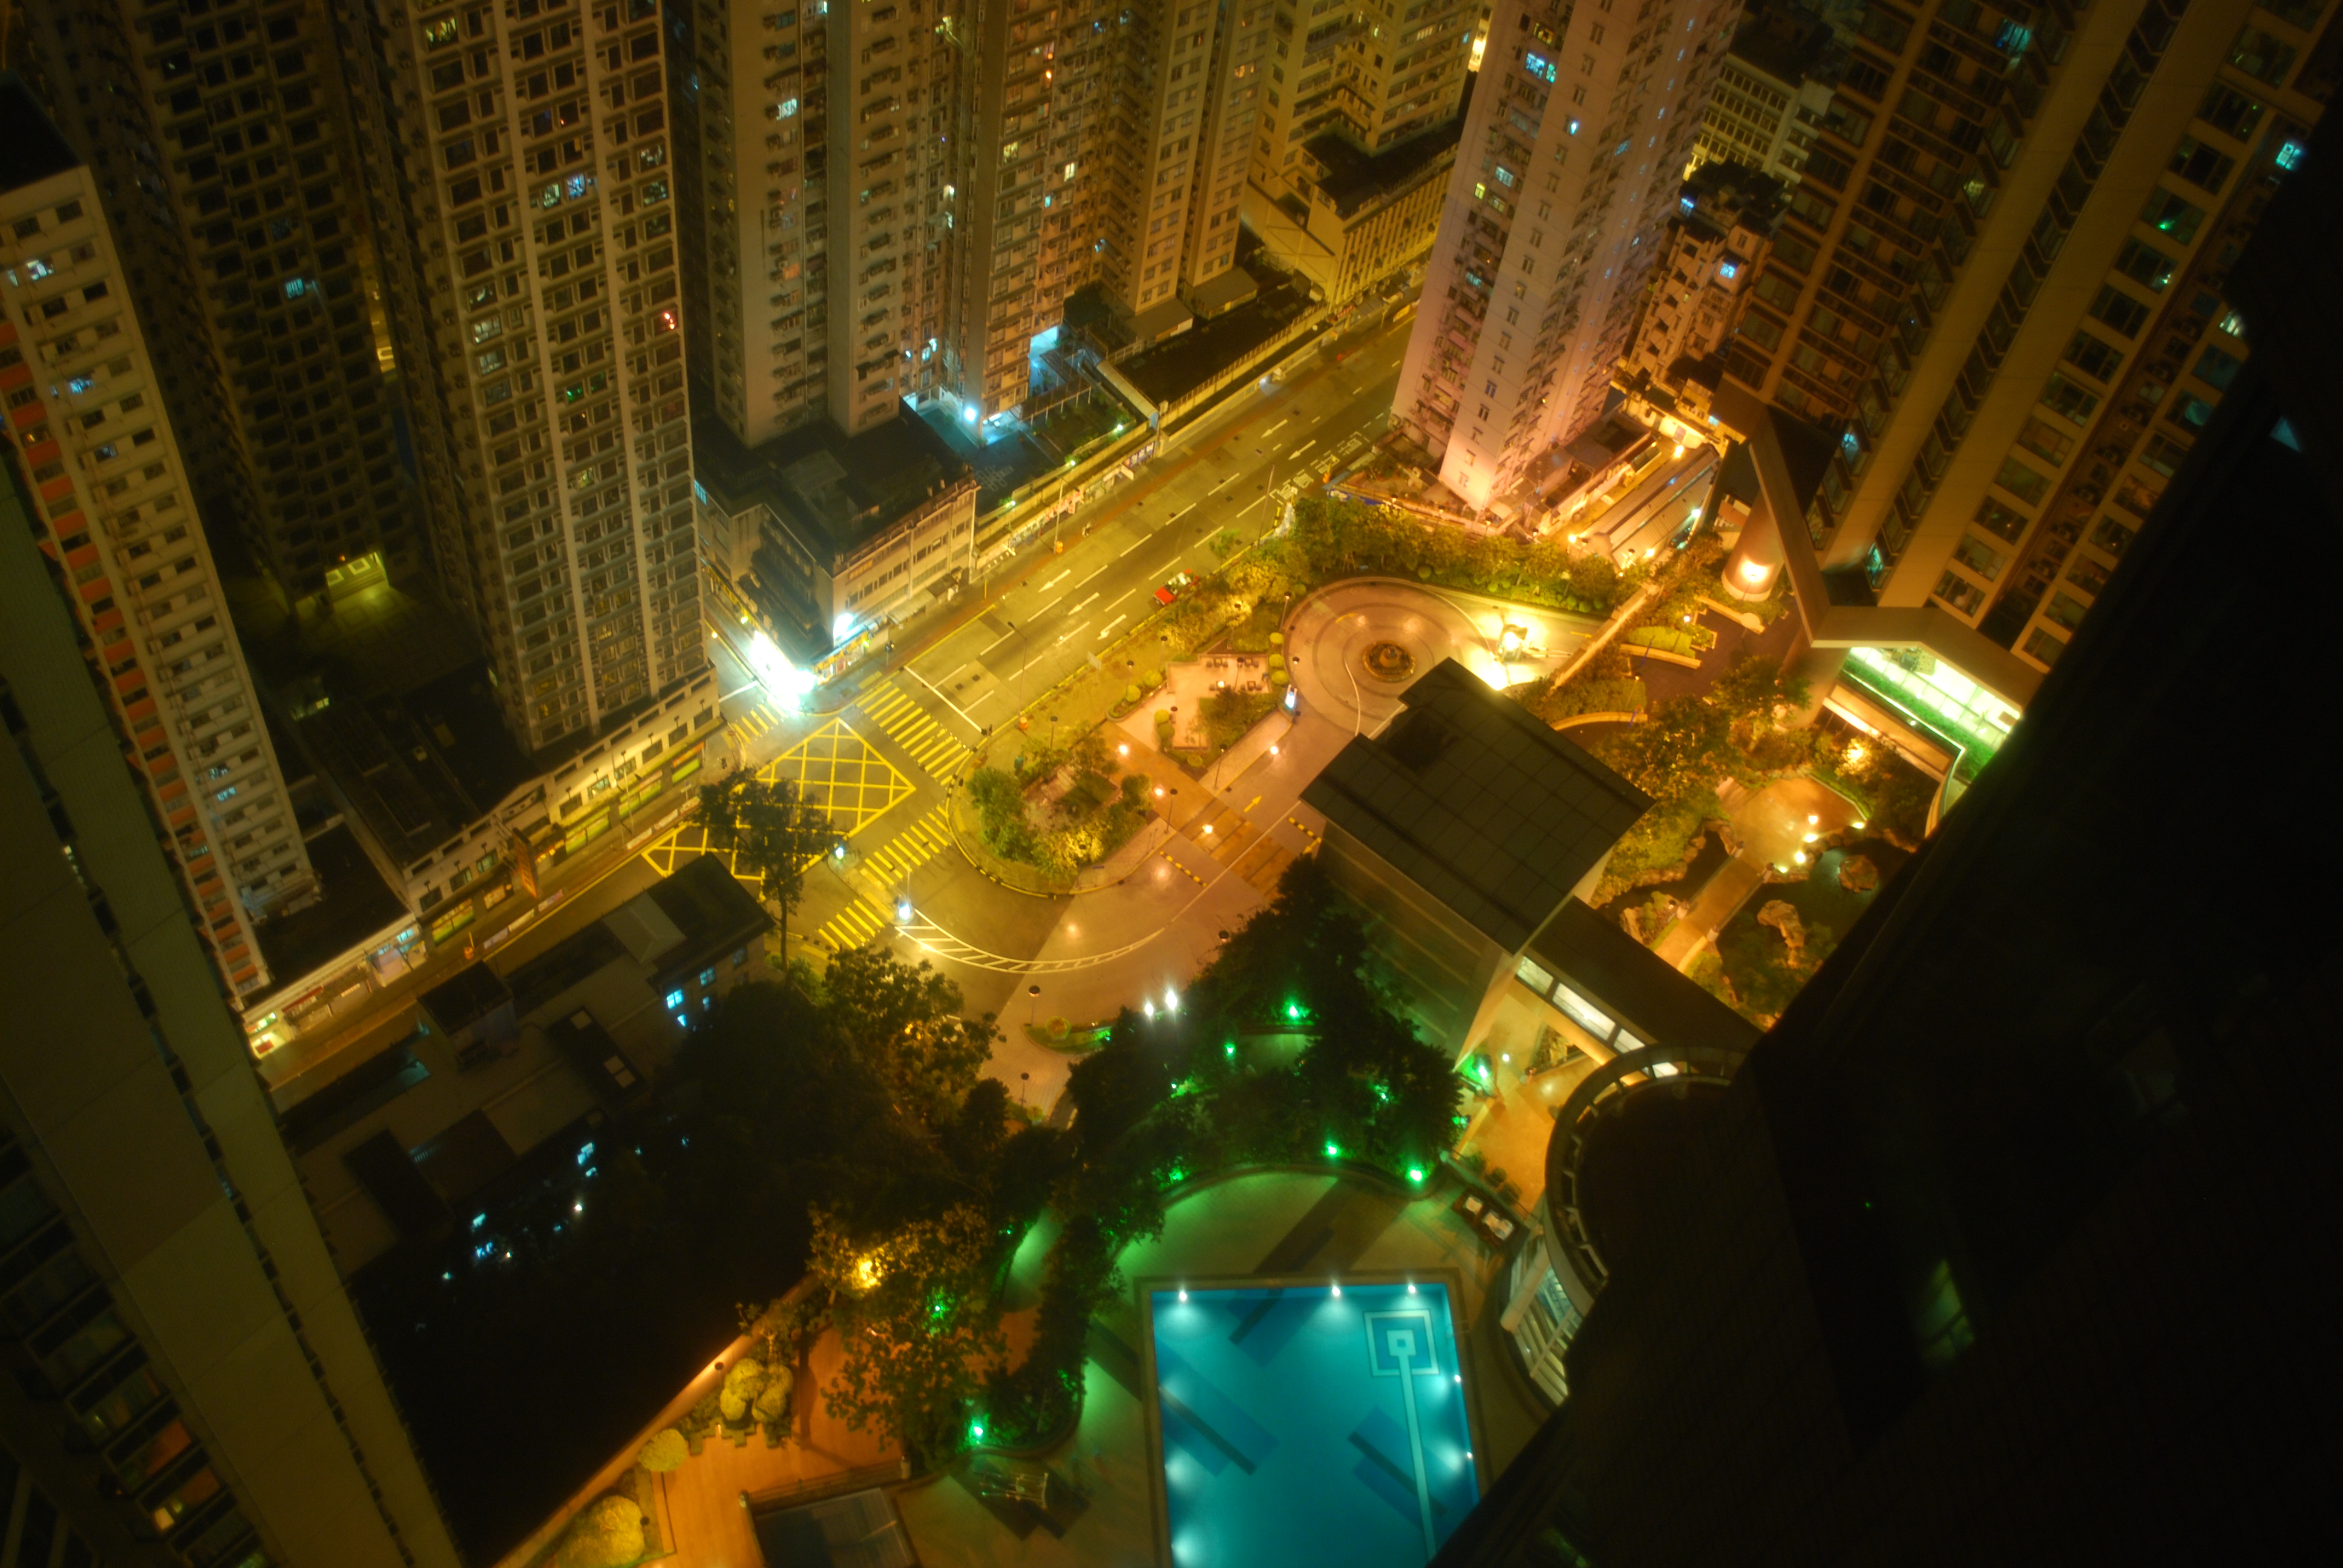
The view down from my dad's friend's apartment. "Apartment" isn't really a good description... condo might be better? At any rate, it was a huge condo. I had this as my background for a while too. Full res here.
Go on to part 1 and part 2.
I'll post more pics from Shanghai and Beijing later, perhaps. If you guys want full res versions of any of these, give a holler down in the comments and I'll post 'em. :)
Showing posts with label Adventures. Show all posts
Monday, February 1, 2010
Pictures From Hong Kong Pt 2
I took around 500 pictures while I was in Hong Kong over the summer, but I never really got around to sorting/processing those photos until this weekend. Obviously 500 is too great a sum for any sane person to want to look through here, so instead here are around 35 (give or take a few) shots that Ana Kim helped me pick out.
Almost everything was shot with my Nikon D60; a few shots were taken with my dad's Sony DSC T-100.
Since there's so many pictures in this post, I've split it up into three parts. This is part 2, and here's part 1 and part 3.
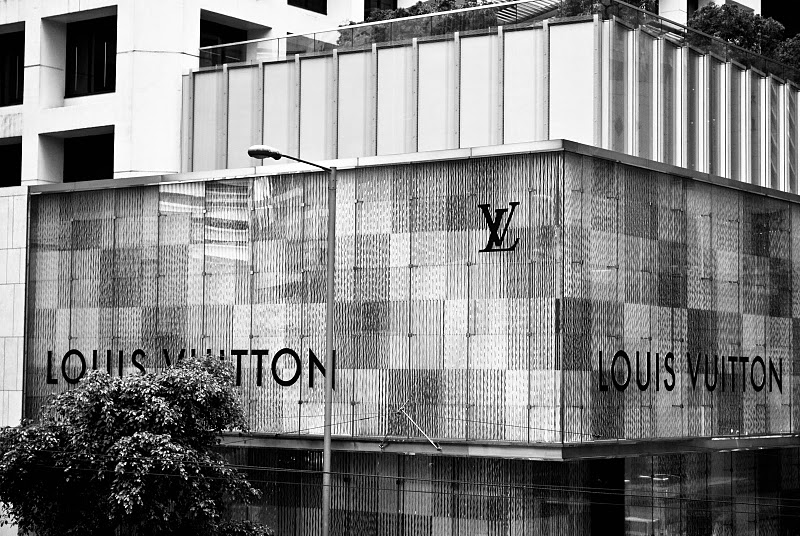
Hong Kong has a LOT of really high end stores. I found this one street corner where there was a giant Louis Vuitton store...
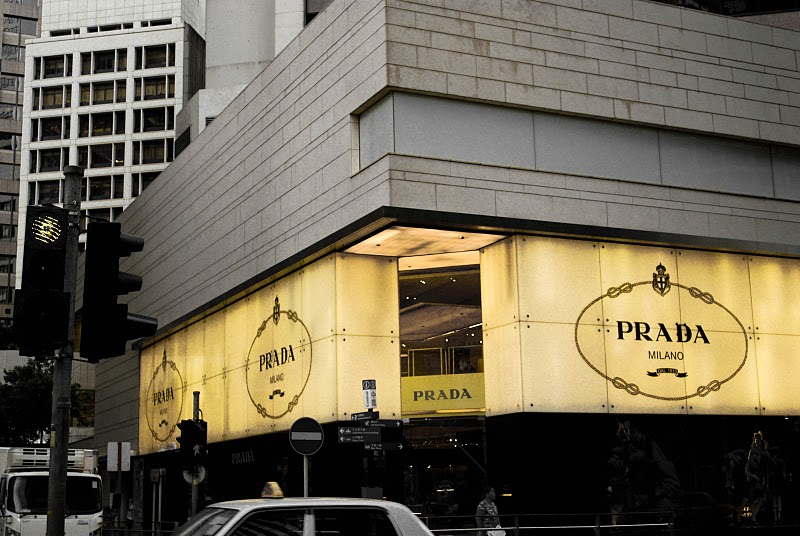
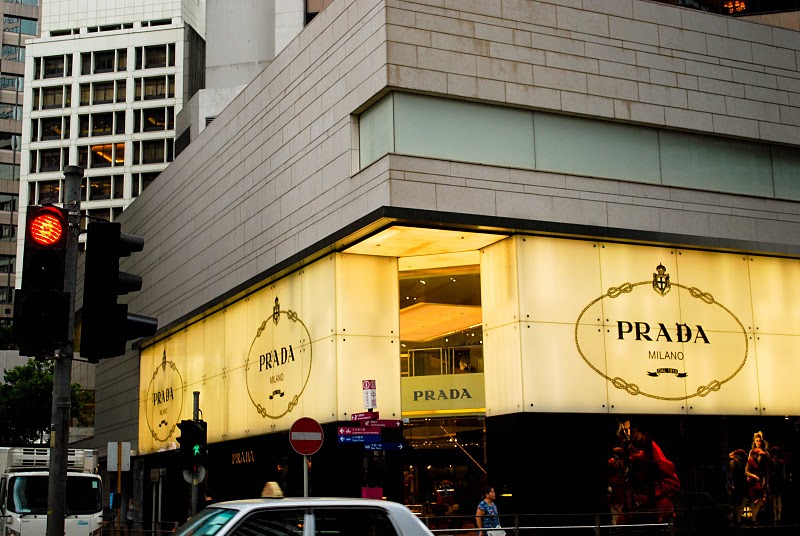
...and not far from the Louis Vuitton store was a big Prada Store.
The previous shot of the Prada Shot has all colors desaturated except for yellow. This shot has all of the colors untouched.
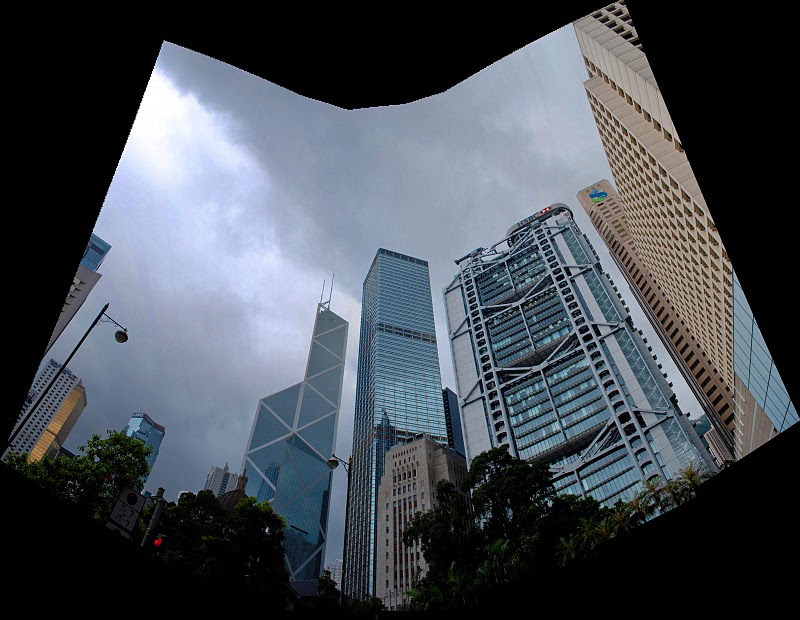
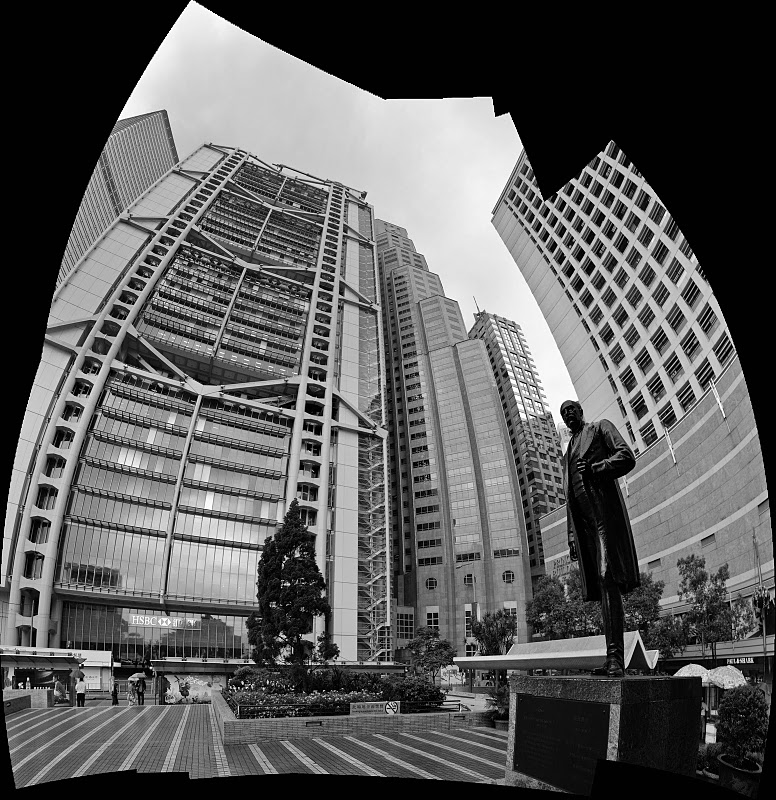
I love experimenting with panoramas and stitching together separate shots into large shots. I thought I'd give stitching a shot in front of the HSBC and Bank of China towers.
I love the tubes and frame and stuff on the HSBC tower. Very very fun to look at. :)
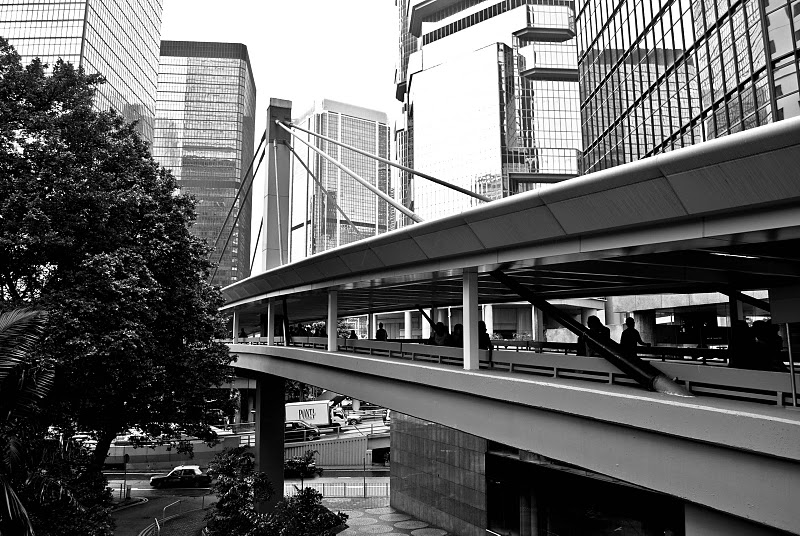
One of the covered walkways had to have a suspension system because it's main span was so long. I think my exact reaction was something like "AWESOME!"
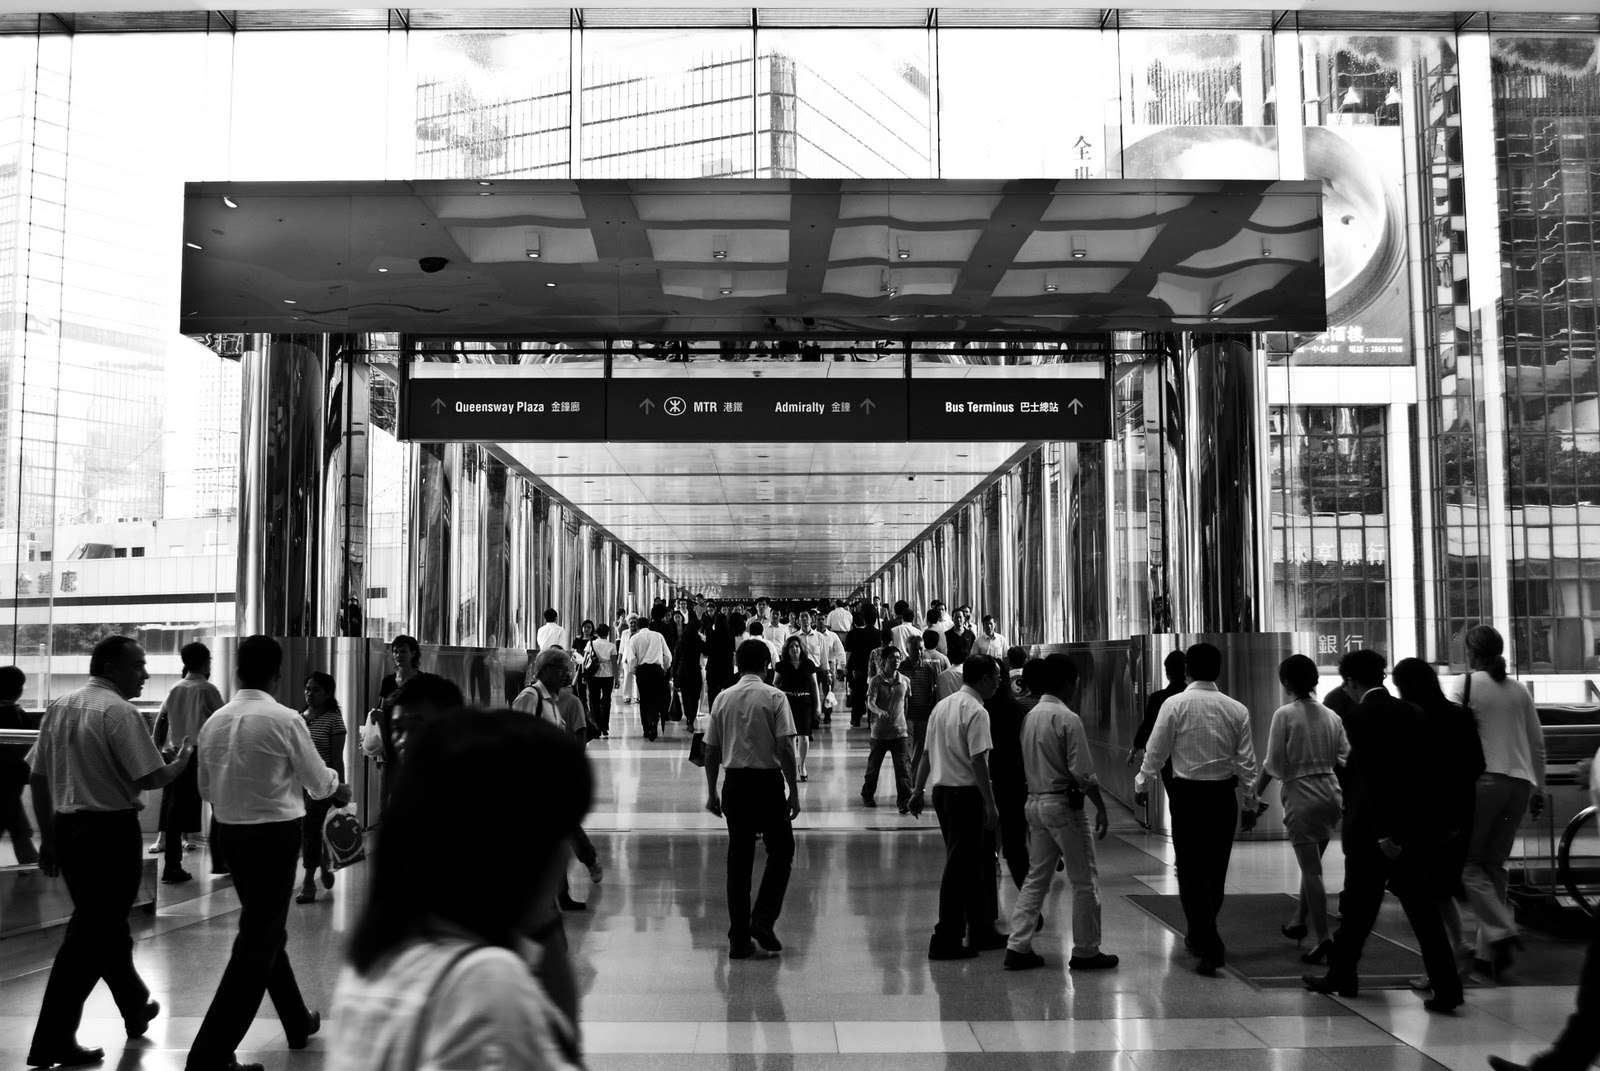
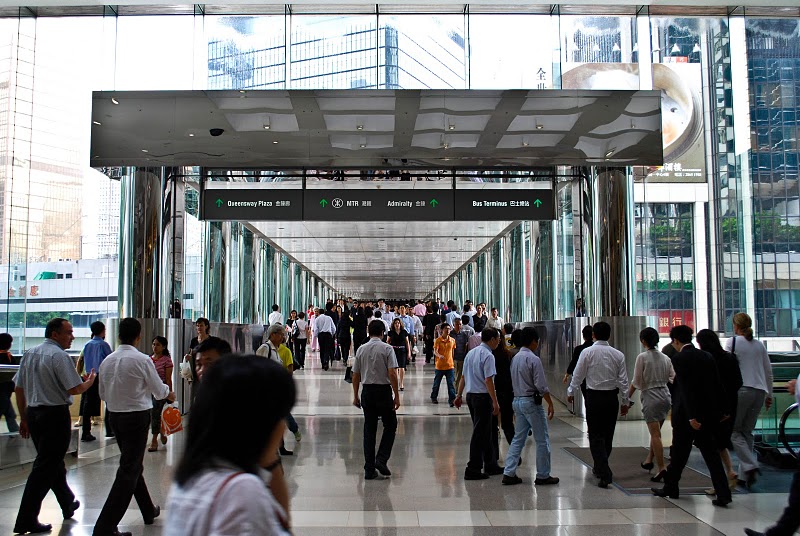
A lot of people use these walkways.
Even Ana couldn't decide between color and black/white for that shot, so both versions are here.
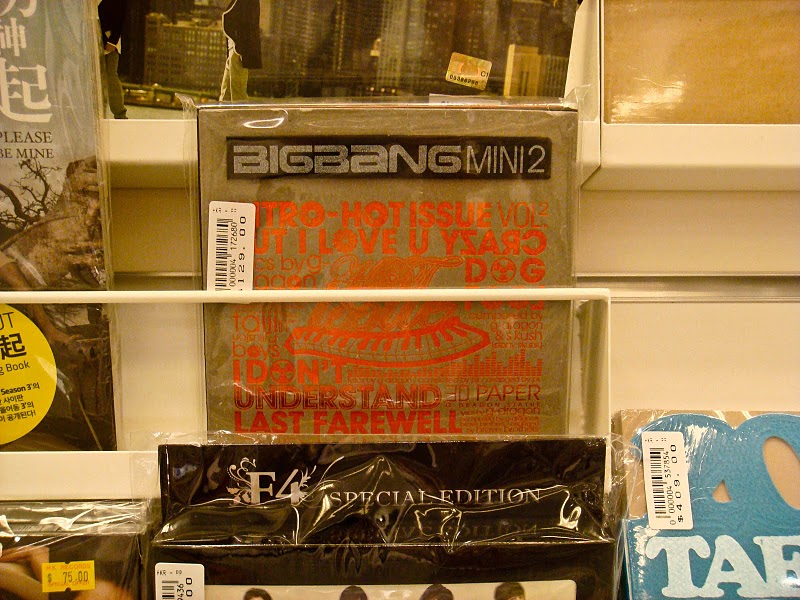
I found this in some random record store! ^^ I really regret not buying it. HAHA.
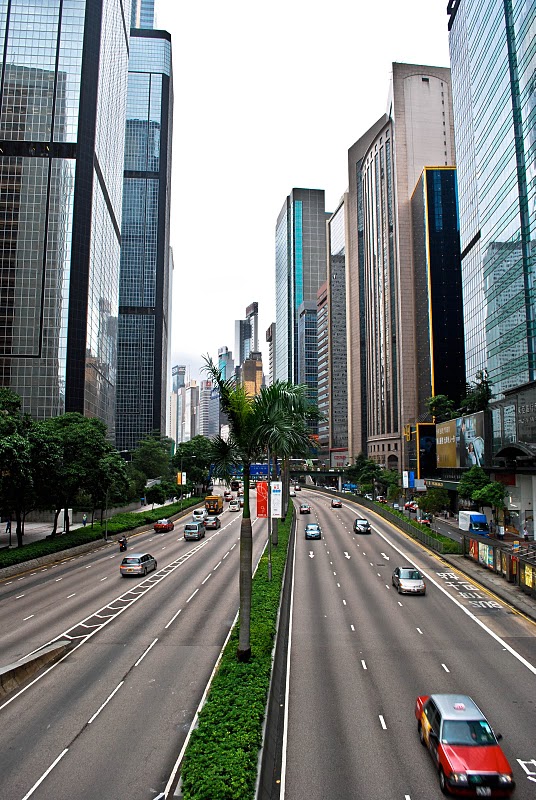
I wasn't expecting to find such grand boulevards in such a cramped city.
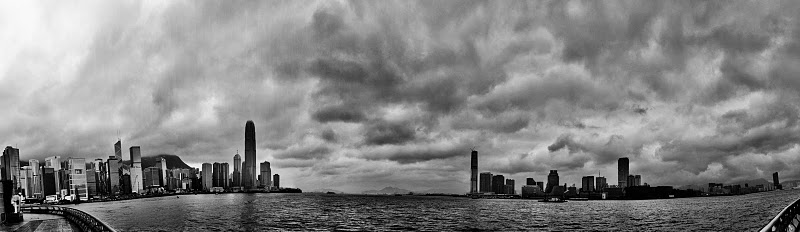
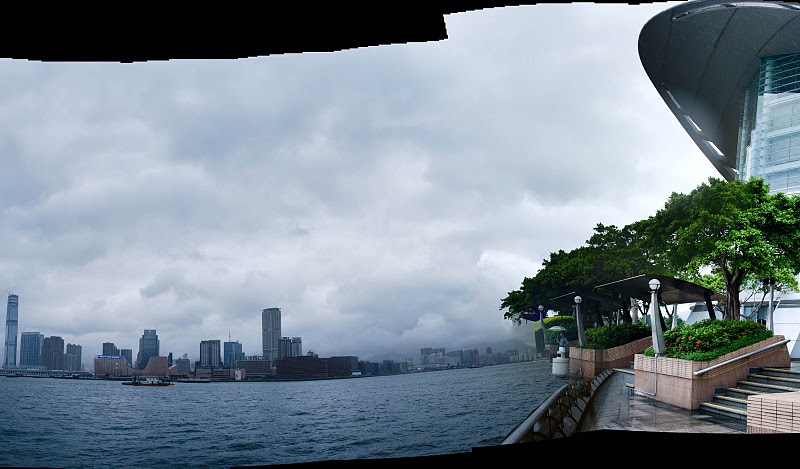
Another panorama that I stitched together. I think this was taken from in front of Hong Kong's main Convention Center (which juts out into Victoria Harbour). On the left is Hong Kong's Central Business District, on the left is Kowloon Island, which is starting to get more and more skyscrapers. The crazy clouds are what an incoming typhoon looks like.
Again, I couldn't pick between color and black/white, so here's both!
This is cropped from a larger panorama. Ana pointed out that the shot looks better cropped this way. :) The guy on the edge of the water with the umbrella is my dad.
Go on to part 1 and part 3.
Almost everything was shot with my Nikon D60; a few shots were taken with my dad's Sony DSC T-100.
Since there's so many pictures in this post, I've split it up into three parts. This is part 2, and here's part 1 and part 3.
Hong Kong has a LOT of really high end stores. I found this one street corner where there was a giant Louis Vuitton store...
...and not far from the Louis Vuitton store was a big Prada Store.
The previous shot of the Prada Shot has all colors desaturated except for yellow. This shot has all of the colors untouched.
I love experimenting with panoramas and stitching together separate shots into large shots. I thought I'd give stitching a shot in front of the HSBC and Bank of China towers.
I love the tubes and frame and stuff on the HSBC tower. Very very fun to look at. :)
One of the covered walkways had to have a suspension system because it's main span was so long. I think my exact reaction was something like "AWESOME!"
A lot of people use these walkways.
Even Ana couldn't decide between color and black/white for that shot, so both versions are here.
I found this in some random record store! ^^ I really regret not buying it. HAHA.
I wasn't expecting to find such grand boulevards in such a cramped city.
Another panorama that I stitched together. I think this was taken from in front of Hong Kong's main Convention Center (which juts out into Victoria Harbour). On the left is Hong Kong's Central Business District, on the left is Kowloon Island, which is starting to get more and more skyscrapers. The crazy clouds are what an incoming typhoon looks like.
Again, I couldn't pick between color and black/white, so here's both!
This is cropped from a larger panorama. Ana pointed out that the shot looks better cropped this way. :) The guy on the edge of the water with the umbrella is my dad.
Go on to part 1 and part 3.
Labels:
Adventures,
China,
Hong Kong,
Photos
Pictures From Hong Kong Pt 1
I took around 500 pictures while I was in Hong Kong over the summer, but I never really got around to sorting/processing those photos until this weekend. Obviously 500 is too great a sum for any sane person to want to look through here, so instead here are around 35 (give or take a few) shots that Ana Kim helped me pick out.
Almost everything was shot with my Nikon D60; a few shots were taken with my dad's Sony DSC T-100.
Since there's so many pictures in this post, I've split it up into three parts. This is part 1, and here's part 2 and part 3.
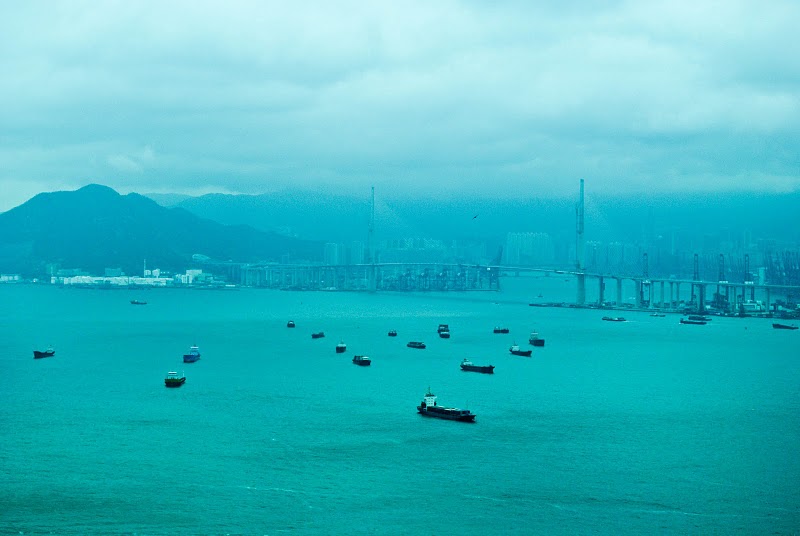
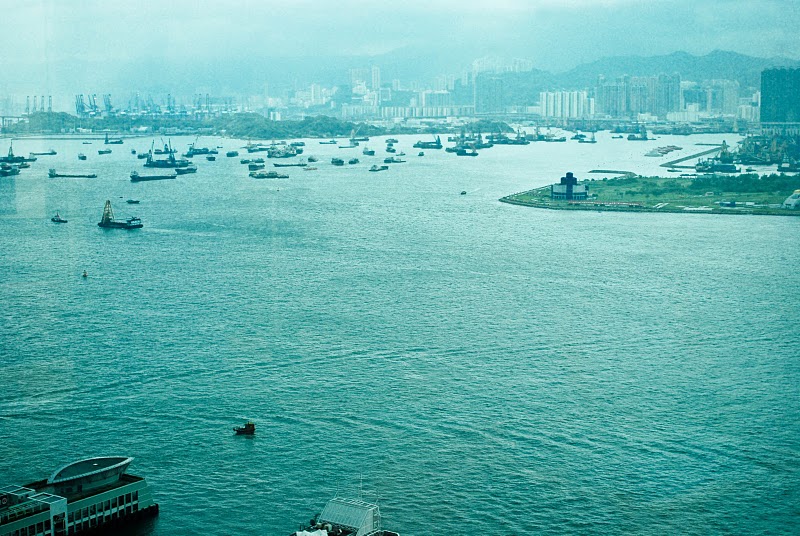
Victoria Harbour from about the 30th floor of International Finance Centre Two. My dad's old college buddy is a director at Nomura's Hong Kong branch (they used to be Lehman Brothers, but Nomura bought them out around the time Lehman collapsed), this shot is from his office. The green hue of the photo is from the green tint of their windows.
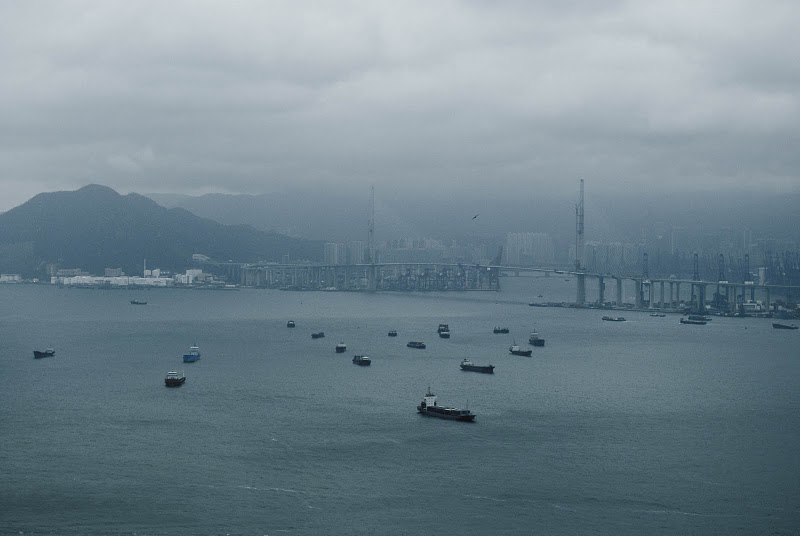
The same shot as the one above, only with the green tint removed. Ana prefers the ones with the green tint though.
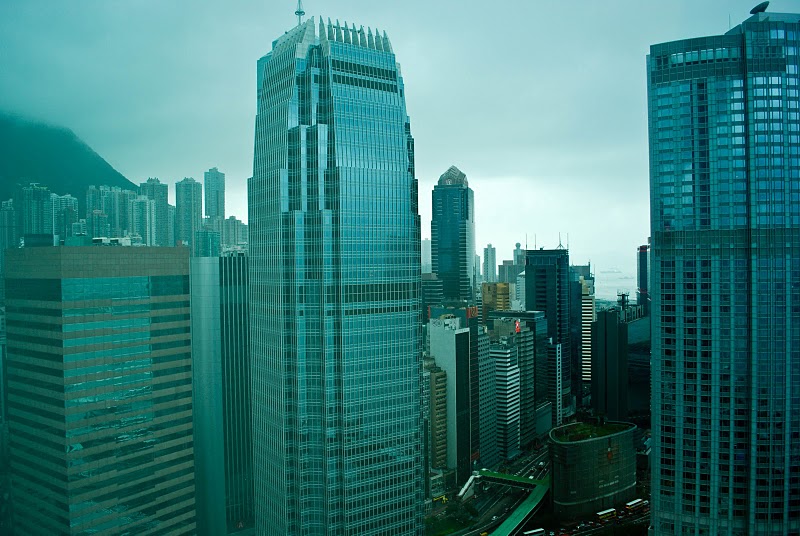
International Finance Centre Two from my dad's friend's office.
Another shot of Victoria Harbour from International Finance Centre Two.
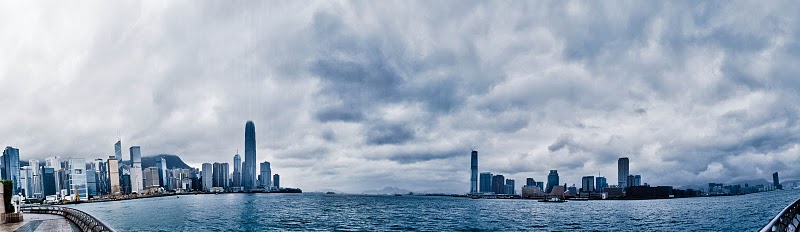
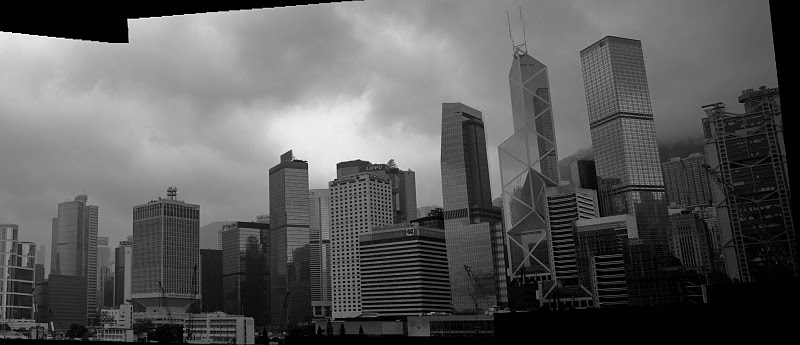
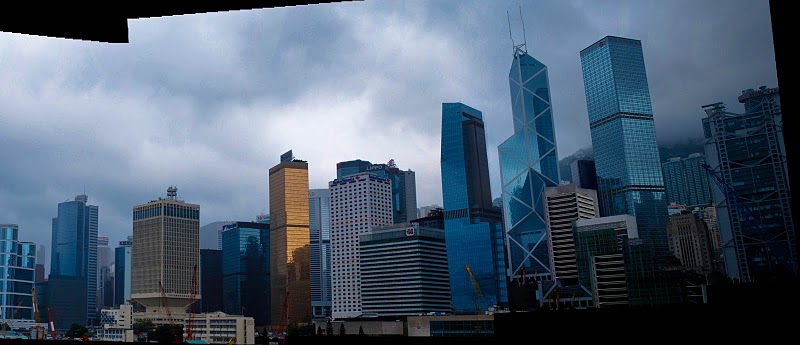
Hong Kong's Central Business District, as seen from the edge of Victoria Harbour.
I couldn't decide between black/white and color, so both are here. A lot of these shots appear here in color and black/white because I'm bad at making up my mind.
All of the buildings in Hong Kong's Central Business District are connected by these elevated covered walkways. Ana liked the orange/yellows and blues here, so this shot stays in color. :)
One of the elevated walkways leading from International Finance Centre.
Go on to part 2 and part 3.
Almost everything was shot with my Nikon D60; a few shots were taken with my dad's Sony DSC T-100.
Since there's so many pictures in this post, I've split it up into three parts. This is part 1, and here's part 2 and part 3.
Victoria Harbour from about the 30th floor of International Finance Centre Two. My dad's old college buddy is a director at Nomura's Hong Kong branch (they used to be Lehman Brothers, but Nomura bought them out around the time Lehman collapsed), this shot is from his office. The green hue of the photo is from the green tint of their windows.
The same shot as the one above, only with the green tint removed. Ana prefers the ones with the green tint though.
International Finance Centre Two from my dad's friend's office.
Another shot of Victoria Harbour from International Finance Centre Two.
Hong Kong's Central Business District, as seen from the edge of Victoria Harbour.
I couldn't decide between black/white and color, so both are here. A lot of these shots appear here in color and black/white because I'm bad at making up my mind.
All of the buildings in Hong Kong's Central Business District are connected by these elevated covered walkways. Ana liked the orange/yellows and blues here, so this shot stays in color. :)
One of the elevated walkways leading from International Finance Centre.
Go on to part 2 and part 3.
Labels:
Adventures,
China,
Hong Kong,
Photos
Friday, January 8, 2010
Developing Raw Image Files (and why you should care)
First off, a disclaimer: I'm not by any means good at photography. I've never taken any photo classes and I barely have any idea of what I'm doing with a camera; I only know how to use a DSLR because I bugged Mary into showing me. So who knows? Maybe everything in this post is wildly off of what I'm actually supposed to be doing.
That being said, here's a quick note on something I've been playing with lately. Here's some technical background first:
So you know how when you take a picture with a film camera, you have to take out the film, go to a photo developing place, and get your film negatives printed as usable, viewable positives? Well, since the beginning of the 21st century, digital cameras have more or less replaced film cameras in all areas except for the most professional and in some vintage or specialized areas of photography. One of the things about digital cameras that people love the most is the fact that a digital camera produces an instantly usable JPG image that doesn't need to be sent to a local Walgreens or Costco for processing and doesn't need to be developed. With digital cameras, you get a nice bunch of files on a memory card instead of a roll of negative film. Awesome.
The problem is, JPGs don't give the flexibility that film negatives give. For normal, everyday use, JPGs are fantastic. With modern compression algorithms, you can get a really nice image with a pretty reasonable file size with JPGs, but what if your picture is overexposed or the white balance is off? Tough luck- a lot of photo programs out there today can do some adjustments and make some attempts at correction, but the fact that the JPG file format is a lossy compression format limits the editing options open to JPG files. Editing and correcting JPG files is possible, but doing so is not nearly as flexible as working with camera raw files. What is a camera raw file? To explain that, we need to look at lossy and nonlossy compression first.
So what is a lossy compression format? Well, let's start with what nonlossy, uncompressed data is. When a camera takes a picture, or a microphone records some sound, or a video camera takes some video, the data from the camera or microphone or whatnot is dumped into a pile of nonlossy, uncompressed data. The problem with nonlossy, uncompressed data is that it takes up an astronomical amount of storage space. For example, an uncompressed WAV audio file can take up hundreds of megabytes for a single three minute song. This is where lossy compression comes in. An MP3 is a lossy compression of raw audio data like WAV files- an MP3 of a single three minute song is usually somewhere from 3 to 6 megabytes in size- much much smaller than the uncompressed WAV file. Yet, the sound that comes through your speakers or headphones from an MP3 is in almost all cases virtually indistinguishable from the sound from a WAV file, assuming that the MP3 was processed correctly. So how does the MP3 manage to sound, for all intents and purposes, the same but remain much smaller in size? The solution is simple- lossy compression such as MP3 files tosses out swaths of data from the uncompressed data, but do so in a way that the end result is still close enough to the original to be hard to distinguish. JPG files operate on the same principle as MP3s- they toss out tons of normally unneeded data to achieve a reasonably small file size while maintaining pretty good image quality (although there are cases where this fails, but that's a discussion for another day). That's the basics of lossy compression, if you want to learn more, the Wikipedia article on the topic is excellent.
So what does all of that stuff have to do with photography? Well, just as how the raw (uncompressed) equivalent to an MP3 is a WAV file, the raw equivalent to a JPG is a camera raw file (the specific file format varies from camera manufacturer to manufacturer, but all of these formats do the same thing- store raw data). You can think of film negatives and the resulting positive prints as the film camera equivalent of camera raw files and JPGs. In fact, for this reason, camera raw files are often referred to as "digital negatives". Much like a film negative, a camera raw file by itself is unusable for printing or scrap booking or editing or whatnot, but since the camera raw file contains ALL of the data output from the camera's image sensor, the camera raw file can be used to produce a finished useable JPG.
So what's the point of using camera raw files if you can set your camera to automatically produce a JPG? Why go to the trouble of getting a JPG out of the raw file yourself? Take a look below at a shot of a sign in Times Square that I took on our trip to New York City:
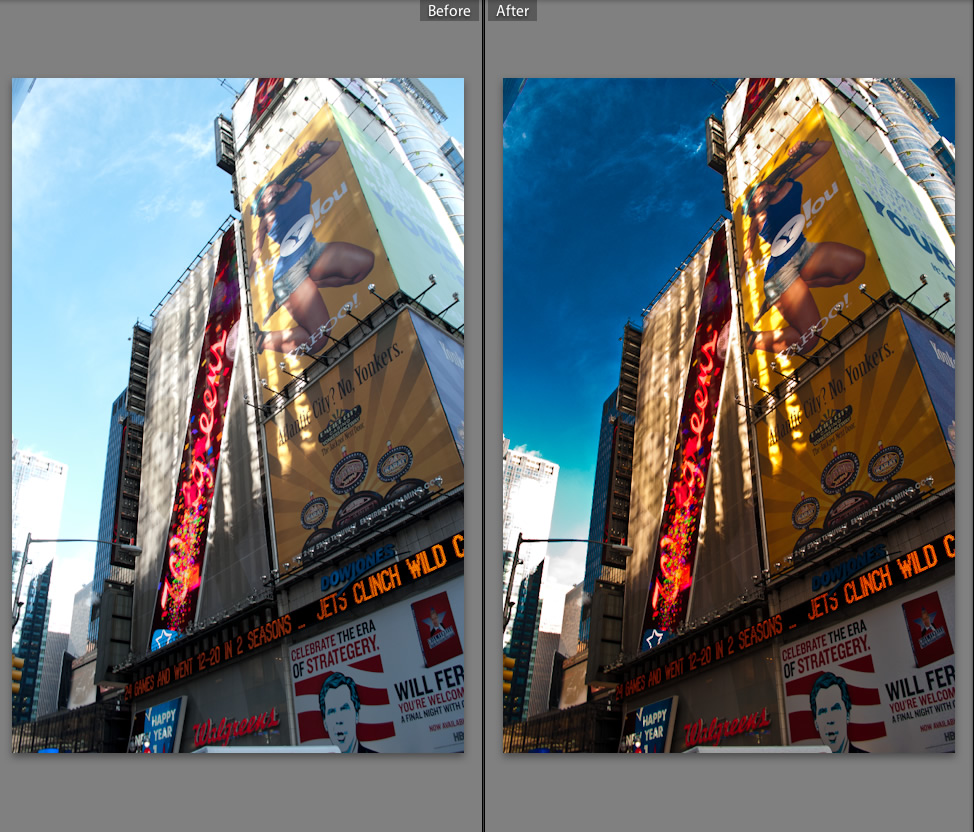
The image on the left is the JPG that the camera automatically processed. The image on the right is the same picture, but it's the JPG that I processed manually from the raw file. When you tell a camera to produce a JPG, the camera takes the raw file produced by its image sensor, and then processes that raw file into a JPG using some educated guesswork to set white balance, color grading, and so and so forth. Cameras today have gotten really good at automatically processing raw files into JPGs, but sometimes they don't get things exactly right. For example, in the camera processed JPG on the left, the photo has lost a lot of color information has been lost. As a result, the image on the left would look washed out when compared to real life. The image on the right has retained more or the color of the original real life scene, and has had corrections for both exposure and white balance errors in the original. The result is a photo much more accurate to what the scene looks like in real life.
That's the magic of raw files. Keeping and using RAW files lets you control the processing steps to produce the resulting JPG, and as a result you can coax a much more real life-accurate image out of the raw file, correct for exposure, white-balance, and other mistakes from shooting, and even change the look of the image away from reality if you wish. Almost all professional photographers today process their images manually from raw files for this very reason. Some examples of applications that support raw processing include Apple's Aperture and Adobe's Lightroom. I use Adobe Lightroom, but all of these applications do more or less the same thing and choosing one is really a matter of personal preference.
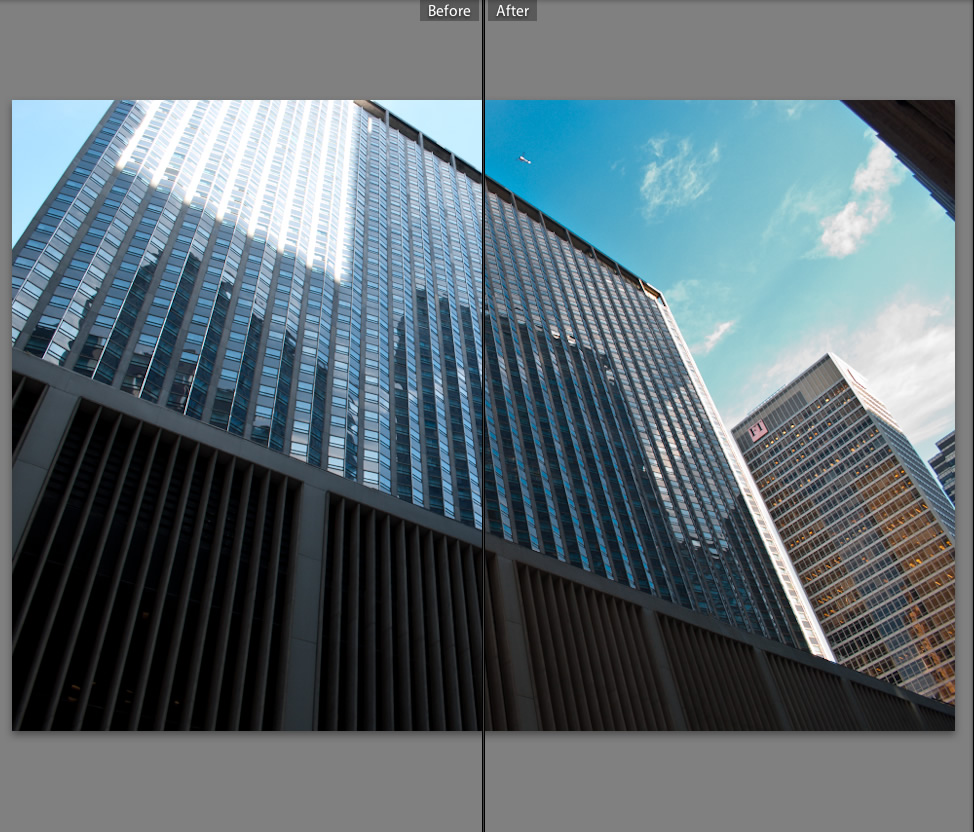
Let's take a look at some more examples (for all examples, "Before" images are camera processed JPGs and "After" images are processed in Adobe Lightroom):
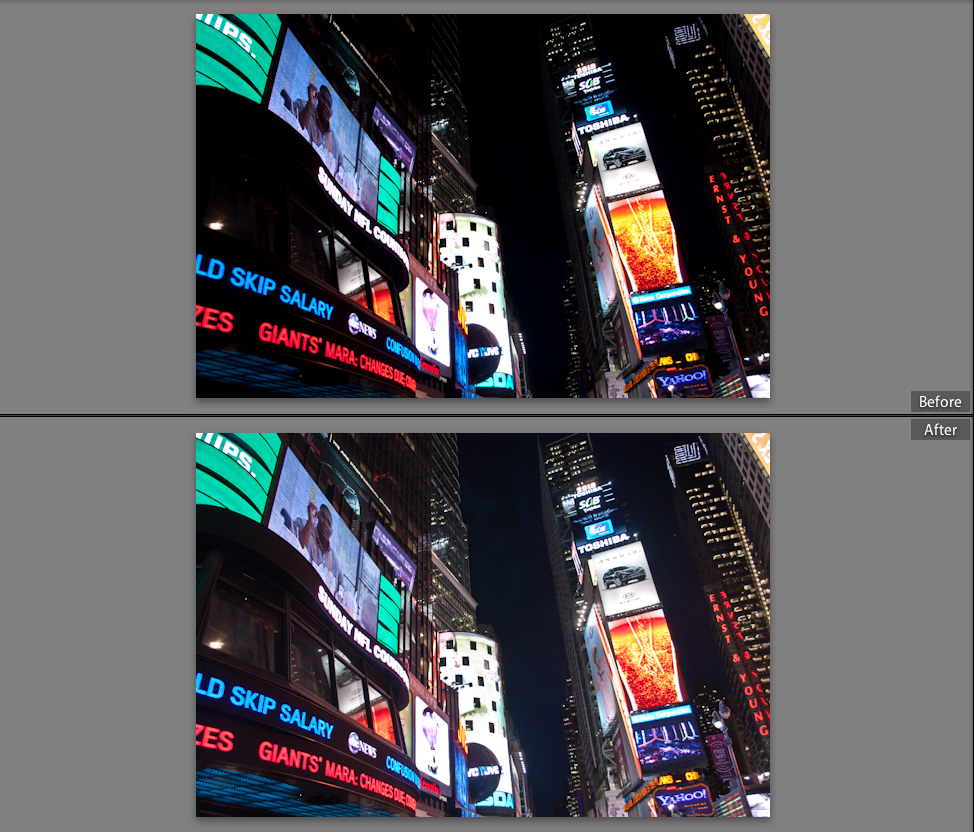
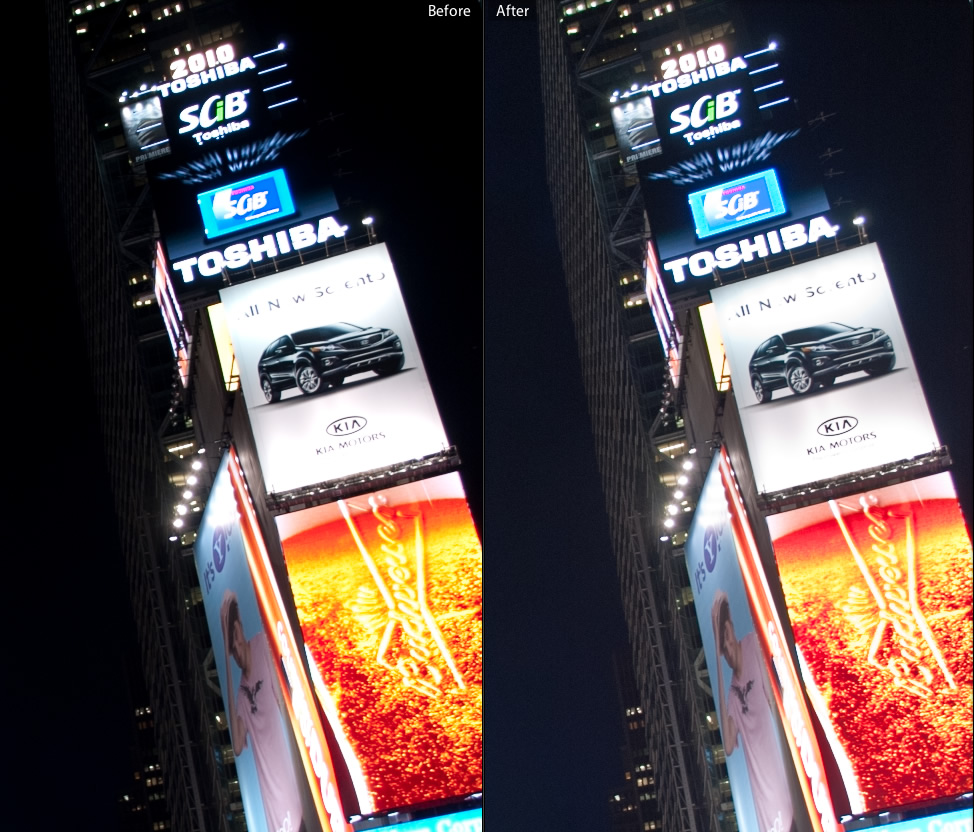
In the above nighttime shot of Times Square, the left image has been slightly underexposed. When I shot the original image, I purposely underexposed the image to lower the risk of blurring from my movement. However, the result is that the camera processed image wipes out a lot of details that are in the dark. Processing the raw file, however, allows details like the skyscraper windows and the night sky to be preserved. The image below is a small section of the above photo where some of this detail is most evident:
Here's another example of correcting for underexposure, taken during a hang-out session at Emma's house:
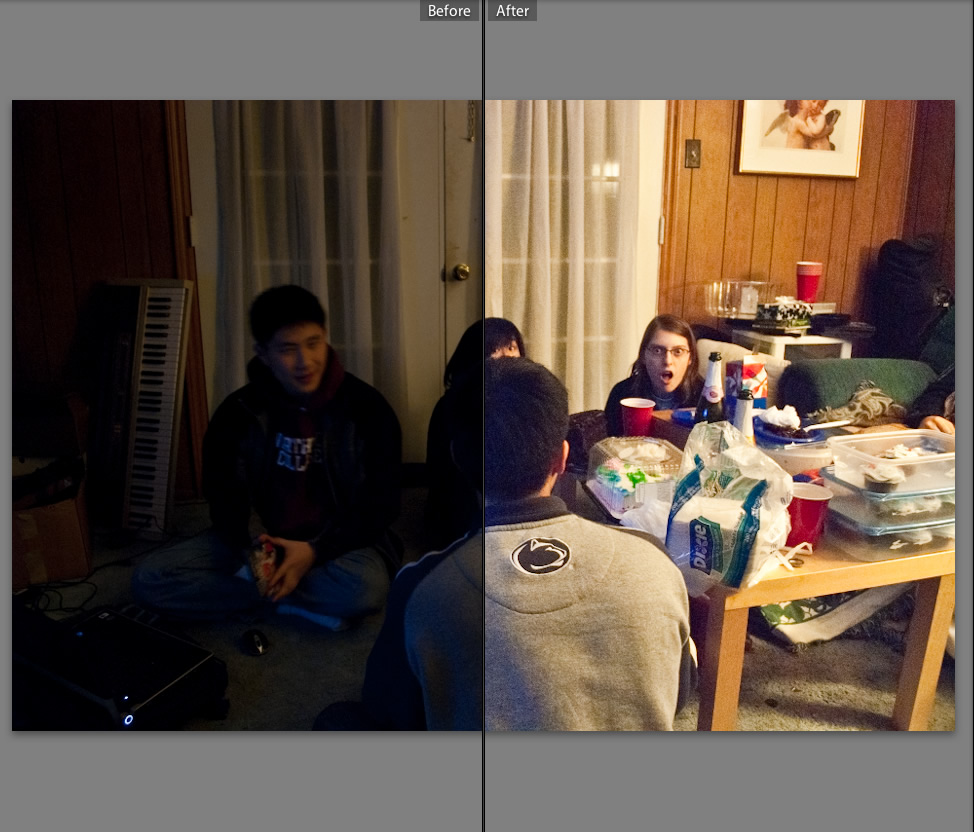
Emma's living room was fairly dimly lit, so taking well lit pictures would require long exposures, but people move during long exposures, resulting in blurry pictures. As an alternative, I purposely underexposed when shooting and then corrected that underexposure in raw processing later.
Now let's look at white balance correction with raw processing:
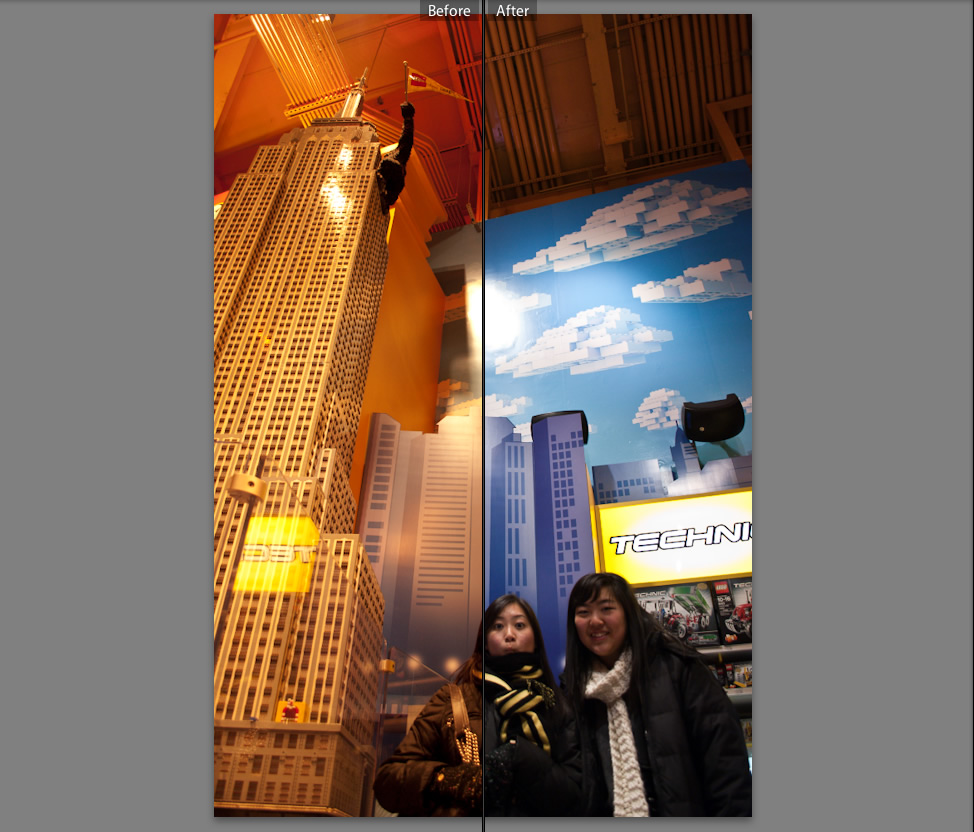
In the above shot, the original photo has an extremely yellow/orange appearance because of the indoor lights at the Toys R Us we were in. The white balance in the original shot is clearly off, so as a result, the resulting camera processed JPG is very yellow/orange. Processing the raw file in Lightroom, however, affords us the opportunity to correct the white balance, resulting in an image much closer to what the human eye sees.
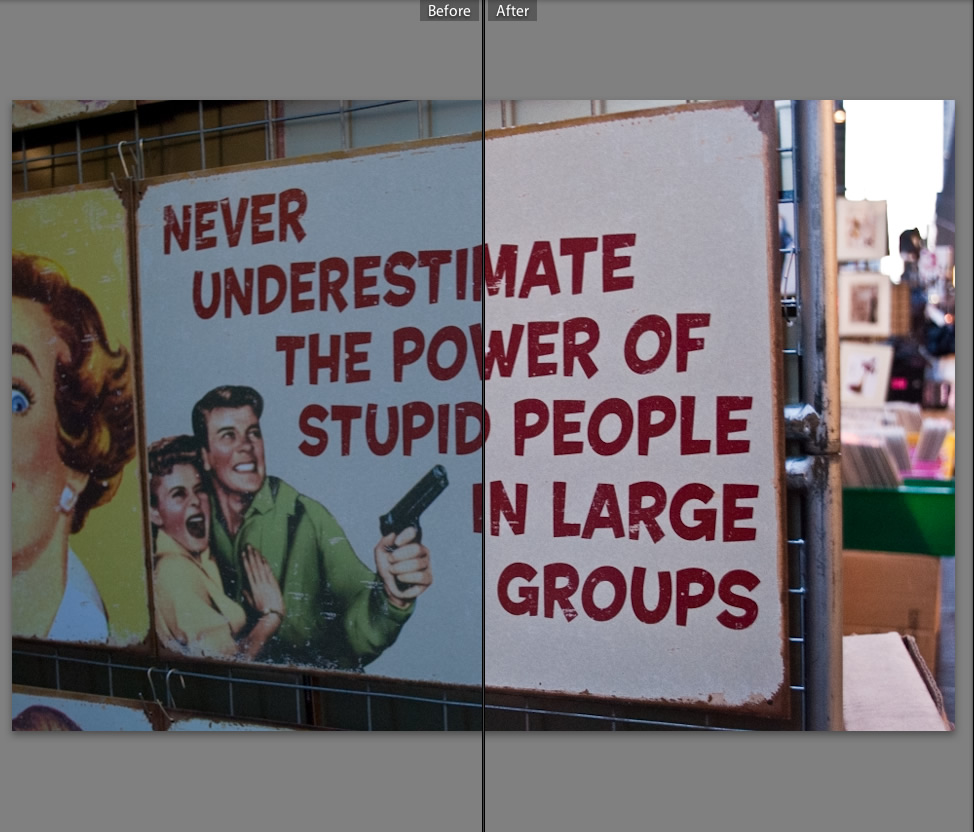
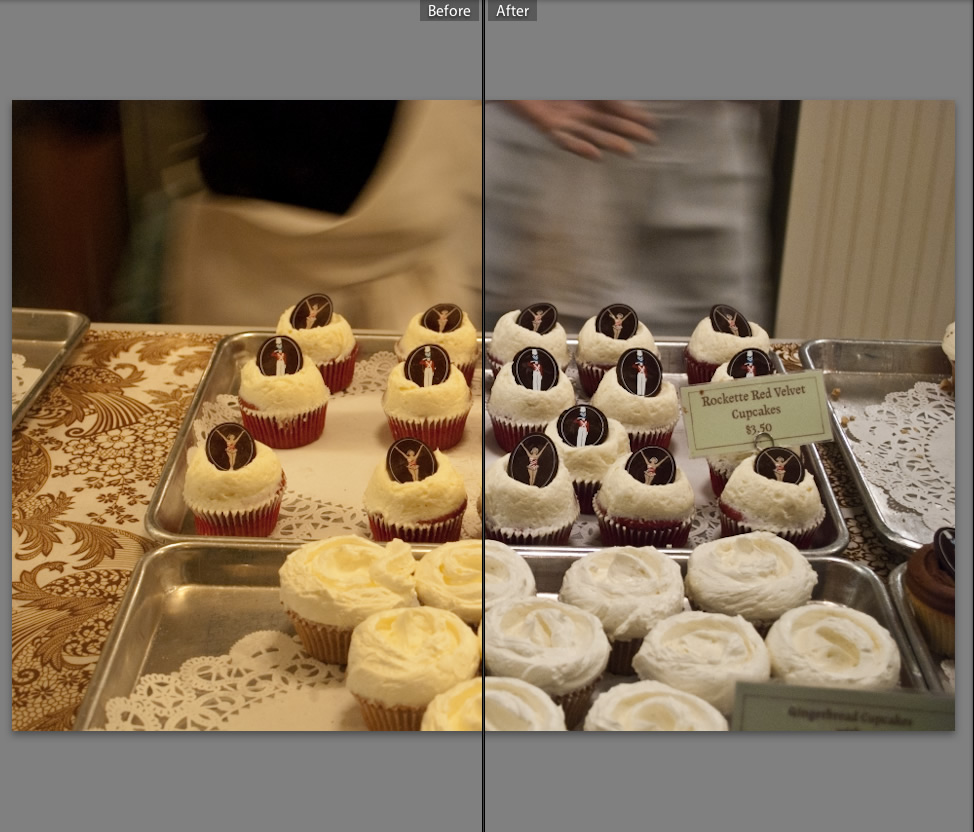
Here's another example of white balance correction:
One more example of white balance correction, this time with delicious cupcakes from Magnolia Bakery.
Now let's look at an example with overexposure:
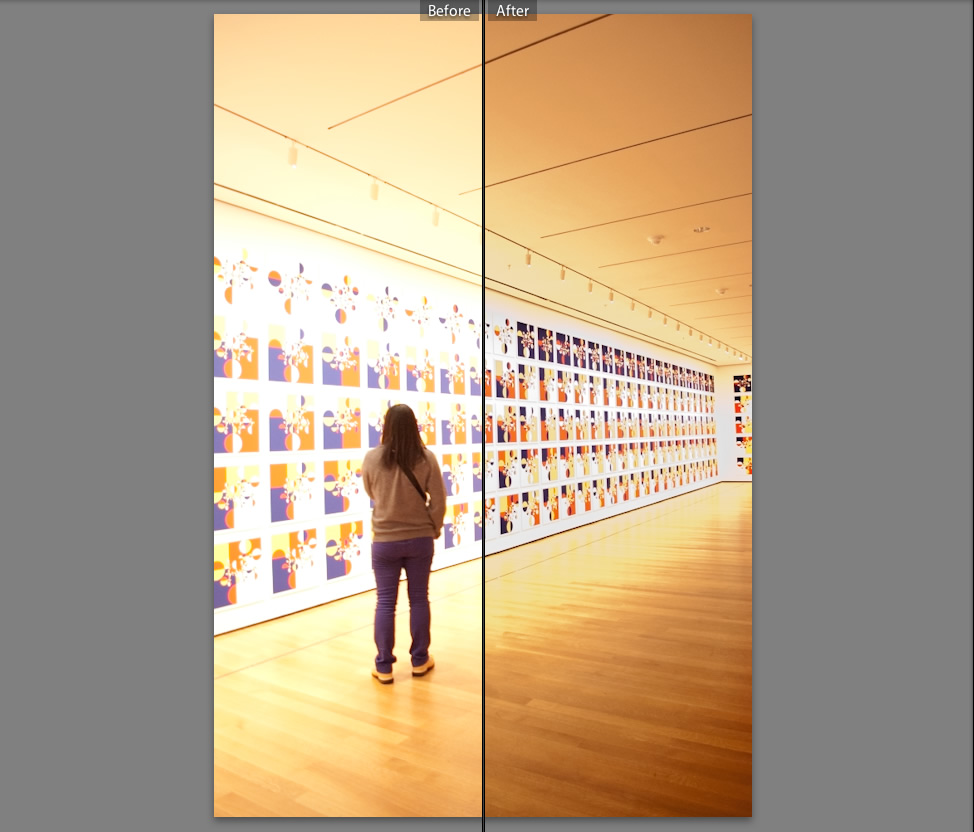
The above shot was taken in a gallery at the Museum of Modern Art. The original shot was overexposed, so as a result, the image on the left looks like the lights in the gallery are washing out everything else in the image. Colors look washed out and details in the floorboards and the artwork on the wall are lost. Applying exposure correction during raw processing, however, allows us to restore details and color. We're not actually adding anything new to the image- all of the details and colors lost in the camera processed JPG still remain in the raw file, we just need to bring them out. The shot below is a more extreme example of detail loss from overexposure and subsequent detail recovery in raw processing:
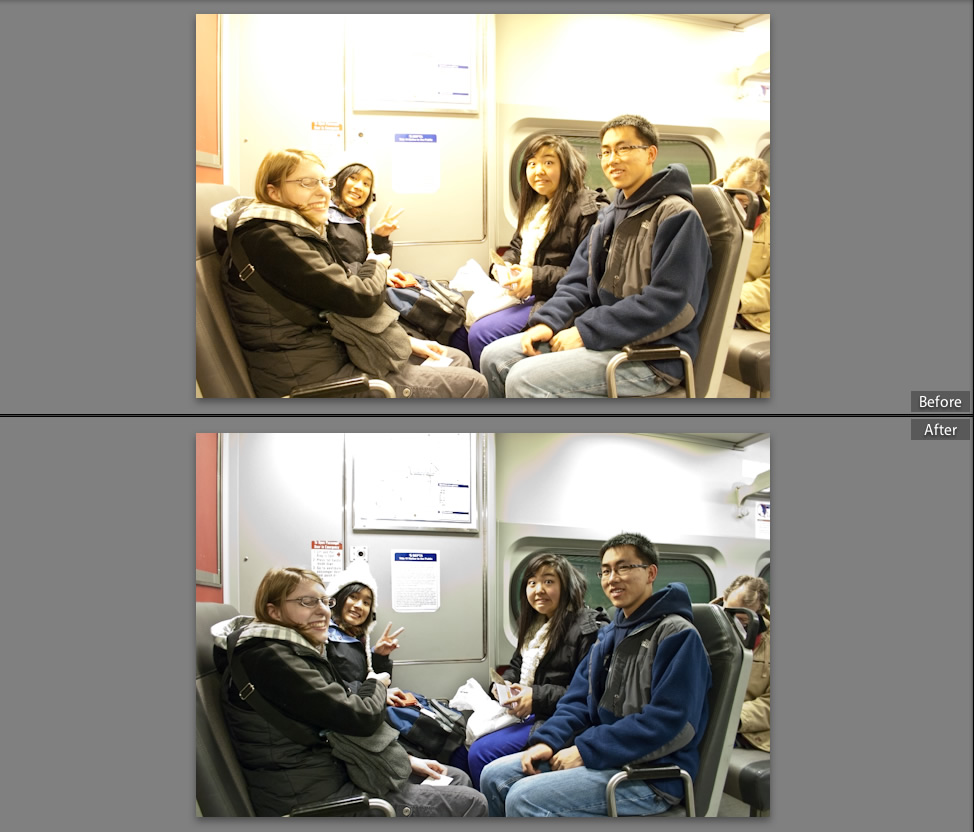
In the top "before" image, overexposure has washed out details such as the train line map on the wall. The "before" image also has white balance issues. Processing, however, allows to get the image on the bottom. The crop below shows the detail we recovered in the train line map:
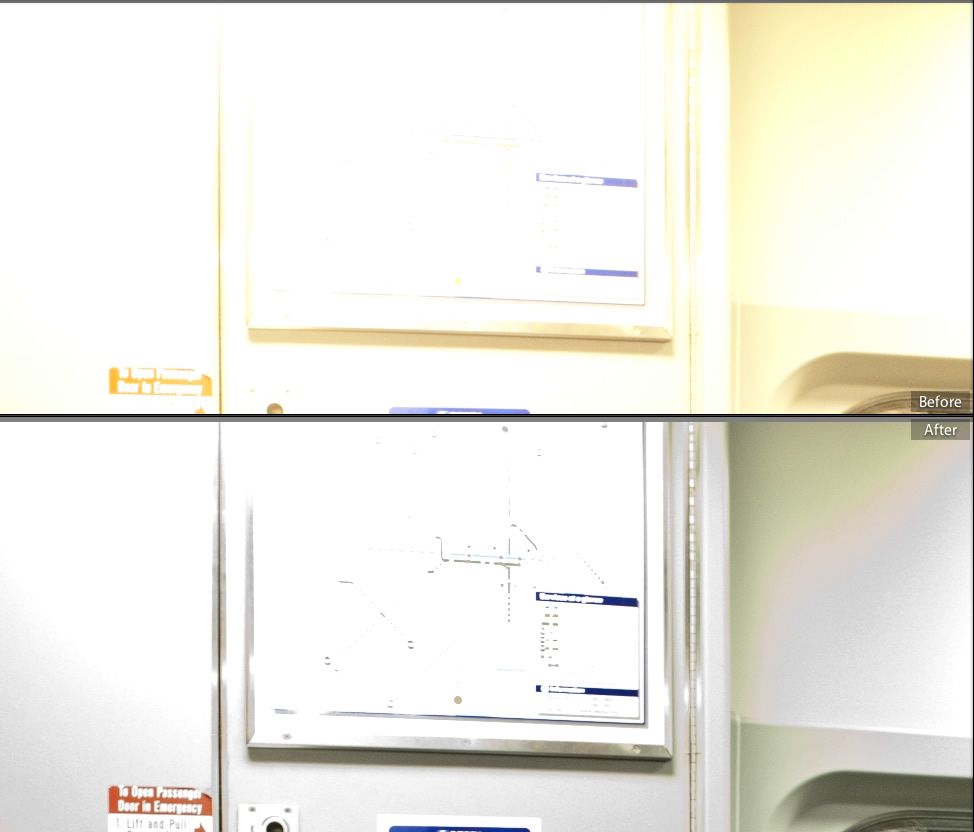
Here's an example with flash. Typically using flash in photography is a bad, bad idea (more on that in the future), but sometimes the setting is so dark that you have to use flash. In the few cases where flash use is acceptable, however, flash still doesn't help out a lot. Flash certainly brightens up the scene, but also casts deep shadows and rarely succeeds in lighting a room evenly. The result is a photo where more is visible than sans flash, but the photo is still extremely dark:
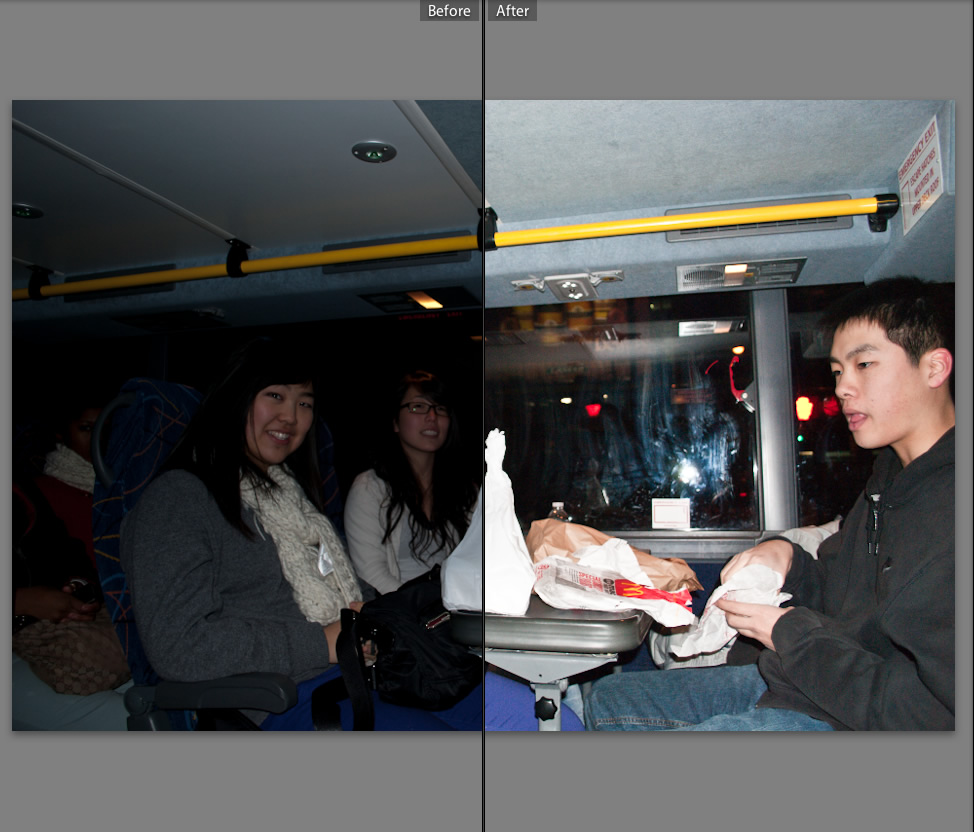
However, we can treat the problem as an exposure and white balance issue, which we can adjust and correct for in raw processing. As a result, we can even out the lighting in the picture somewhat and make the results from the flash a little less harsh.
Finally, Here's an example where sunlight acts a nuisance by causing exposure issues again:
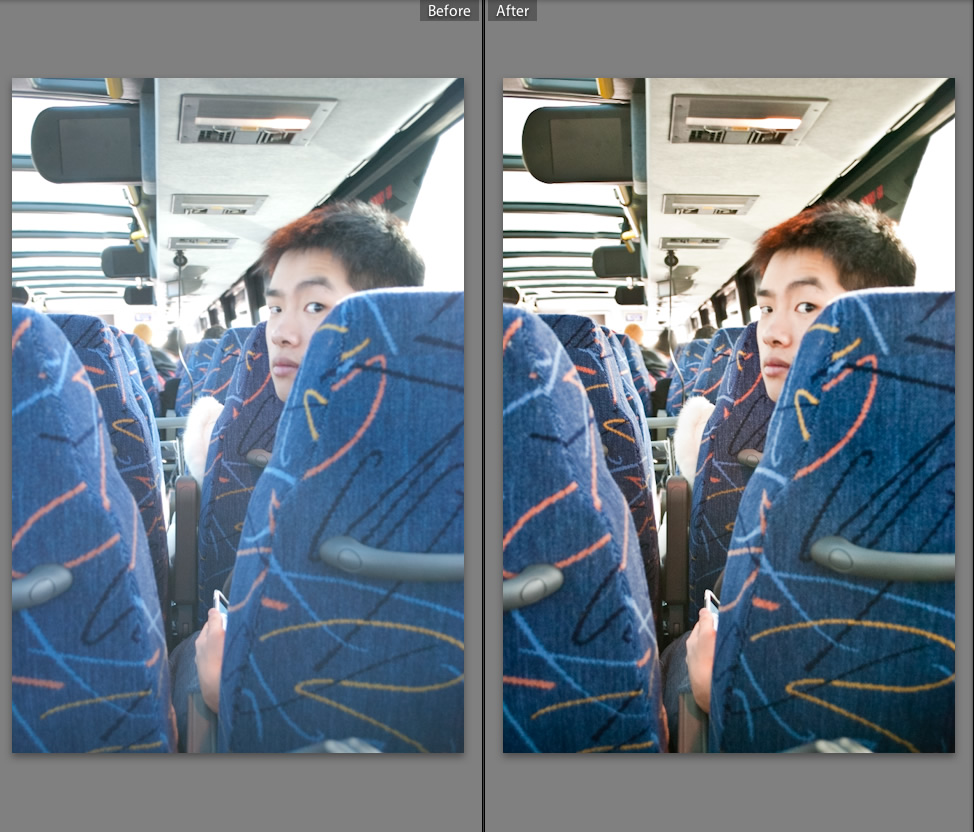
In the shot above, the sunlight streaming in the bus we were on made for excellent lighting, but also meant exposure issues and, as a result, washed out colors. Raw processing allows us to get the much more reality-accurate image in the right.
Another example of sunlight issues, this time on a skyscraper:
All of the above being said, however, using camera raw files has drawbacks too. The main advantage using camera processed JPGs holds over camera raw files is ease and convenience- processing raw files takes time and adds an additional step to any photo processing workflow. On top of that, camera raw files can be anywhere from two to ten times as large as the equivalent JPG, depending on the nonlossy compression scheme used in the specific file format. Fortunately, however, many cameras today have an option to produce a JPG, but also keep a copy of the raw file in case you want to play with it yourself. This way you can instantly get a useable, workable JPG file, but can also go back and process the raw later if you feel so inclined.
In the end, whether or not a picture looks good or not requires more than just raw processing and is completely subjective. Even so, raw processing can still be useful. I have to admit, I'm not particularly good at actually framing shots or whatnot, but at least I can make sure any flaws in my photos are my fault alone and not the result of automatic camera processing.
That being said, here's a quick note on something I've been playing with lately. Here's some technical background first:
So you know how when you take a picture with a film camera, you have to take out the film, go to a photo developing place, and get your film negatives printed as usable, viewable positives? Well, since the beginning of the 21st century, digital cameras have more or less replaced film cameras in all areas except for the most professional and in some vintage or specialized areas of photography. One of the things about digital cameras that people love the most is the fact that a digital camera produces an instantly usable JPG image that doesn't need to be sent to a local Walgreens or Costco for processing and doesn't need to be developed. With digital cameras, you get a nice bunch of files on a memory card instead of a roll of negative film. Awesome.
The problem is, JPGs don't give the flexibility that film negatives give. For normal, everyday use, JPGs are fantastic. With modern compression algorithms, you can get a really nice image with a pretty reasonable file size with JPGs, but what if your picture is overexposed or the white balance is off? Tough luck- a lot of photo programs out there today can do some adjustments and make some attempts at correction, but the fact that the JPG file format is a lossy compression format limits the editing options open to JPG files. Editing and correcting JPG files is possible, but doing so is not nearly as flexible as working with camera raw files. What is a camera raw file? To explain that, we need to look at lossy and nonlossy compression first.
So what is a lossy compression format? Well, let's start with what nonlossy, uncompressed data is. When a camera takes a picture, or a microphone records some sound, or a video camera takes some video, the data from the camera or microphone or whatnot is dumped into a pile of nonlossy, uncompressed data. The problem with nonlossy, uncompressed data is that it takes up an astronomical amount of storage space. For example, an uncompressed WAV audio file can take up hundreds of megabytes for a single three minute song. This is where lossy compression comes in. An MP3 is a lossy compression of raw audio data like WAV files- an MP3 of a single three minute song is usually somewhere from 3 to 6 megabytes in size- much much smaller than the uncompressed WAV file. Yet, the sound that comes through your speakers or headphones from an MP3 is in almost all cases virtually indistinguishable from the sound from a WAV file, assuming that the MP3 was processed correctly. So how does the MP3 manage to sound, for all intents and purposes, the same but remain much smaller in size? The solution is simple- lossy compression such as MP3 files tosses out swaths of data from the uncompressed data, but do so in a way that the end result is still close enough to the original to be hard to distinguish. JPG files operate on the same principle as MP3s- they toss out tons of normally unneeded data to achieve a reasonably small file size while maintaining pretty good image quality (although there are cases where this fails, but that's a discussion for another day). That's the basics of lossy compression, if you want to learn more, the Wikipedia article on the topic is excellent.
So what does all of that stuff have to do with photography? Well, just as how the raw (uncompressed) equivalent to an MP3 is a WAV file, the raw equivalent to a JPG is a camera raw file (the specific file format varies from camera manufacturer to manufacturer, but all of these formats do the same thing- store raw data). You can think of film negatives and the resulting positive prints as the film camera equivalent of camera raw files and JPGs. In fact, for this reason, camera raw files are often referred to as "digital negatives". Much like a film negative, a camera raw file by itself is unusable for printing or scrap booking or editing or whatnot, but since the camera raw file contains ALL of the data output from the camera's image sensor, the camera raw file can be used to produce a finished useable JPG.
So what's the point of using camera raw files if you can set your camera to automatically produce a JPG? Why go to the trouble of getting a JPG out of the raw file yourself? Take a look below at a shot of a sign in Times Square that I took on our trip to New York City:
The image on the left is the JPG that the camera automatically processed. The image on the right is the same picture, but it's the JPG that I processed manually from the raw file. When you tell a camera to produce a JPG, the camera takes the raw file produced by its image sensor, and then processes that raw file into a JPG using some educated guesswork to set white balance, color grading, and so and so forth. Cameras today have gotten really good at automatically processing raw files into JPGs, but sometimes they don't get things exactly right. For example, in the camera processed JPG on the left, the photo has lost a lot of color information has been lost. As a result, the image on the left would look washed out when compared to real life. The image on the right has retained more or the color of the original real life scene, and has had corrections for both exposure and white balance errors in the original. The result is a photo much more accurate to what the scene looks like in real life.
That's the magic of raw files. Keeping and using RAW files lets you control the processing steps to produce the resulting JPG, and as a result you can coax a much more real life-accurate image out of the raw file, correct for exposure, white-balance, and other mistakes from shooting, and even change the look of the image away from reality if you wish. Almost all professional photographers today process their images manually from raw files for this very reason. Some examples of applications that support raw processing include Apple's Aperture and Adobe's Lightroom. I use Adobe Lightroom, but all of these applications do more or less the same thing and choosing one is really a matter of personal preference.
Let's take a look at some more examples (for all examples, "Before" images are camera processed JPGs and "After" images are processed in Adobe Lightroom):
In the above nighttime shot of Times Square, the left image has been slightly underexposed. When I shot the original image, I purposely underexposed the image to lower the risk of blurring from my movement. However, the result is that the camera processed image wipes out a lot of details that are in the dark. Processing the raw file, however, allows details like the skyscraper windows and the night sky to be preserved. The image below is a small section of the above photo where some of this detail is most evident:
Here's another example of correcting for underexposure, taken during a hang-out session at Emma's house:
Emma's living room was fairly dimly lit, so taking well lit pictures would require long exposures, but people move during long exposures, resulting in blurry pictures. As an alternative, I purposely underexposed when shooting and then corrected that underexposure in raw processing later.
Now let's look at white balance correction with raw processing:
In the above shot, the original photo has an extremely yellow/orange appearance because of the indoor lights at the Toys R Us we were in. The white balance in the original shot is clearly off, so as a result, the resulting camera processed JPG is very yellow/orange. Processing the raw file in Lightroom, however, affords us the opportunity to correct the white balance, resulting in an image much closer to what the human eye sees.
Here's another example of white balance correction:
One more example of white balance correction, this time with delicious cupcakes from Magnolia Bakery.
Now let's look at an example with overexposure:
The above shot was taken in a gallery at the Museum of Modern Art. The original shot was overexposed, so as a result, the image on the left looks like the lights in the gallery are washing out everything else in the image. Colors look washed out and details in the floorboards and the artwork on the wall are lost. Applying exposure correction during raw processing, however, allows us to restore details and color. We're not actually adding anything new to the image- all of the details and colors lost in the camera processed JPG still remain in the raw file, we just need to bring them out. The shot below is a more extreme example of detail loss from overexposure and subsequent detail recovery in raw processing:
In the top "before" image, overexposure has washed out details such as the train line map on the wall. The "before" image also has white balance issues. Processing, however, allows to get the image on the bottom. The crop below shows the detail we recovered in the train line map:
Here's an example with flash. Typically using flash in photography is a bad, bad idea (more on that in the future), but sometimes the setting is so dark that you have to use flash. In the few cases where flash use is acceptable, however, flash still doesn't help out a lot. Flash certainly brightens up the scene, but also casts deep shadows and rarely succeeds in lighting a room evenly. The result is a photo where more is visible than sans flash, but the photo is still extremely dark:
However, we can treat the problem as an exposure and white balance issue, which we can adjust and correct for in raw processing. As a result, we can even out the lighting in the picture somewhat and make the results from the flash a little less harsh.
Finally, Here's an example where sunlight acts a nuisance by causing exposure issues again:
In the shot above, the sunlight streaming in the bus we were on made for excellent lighting, but also meant exposure issues and, as a result, washed out colors. Raw processing allows us to get the much more reality-accurate image in the right.
Another example of sunlight issues, this time on a skyscraper:
All of the above being said, however, using camera raw files has drawbacks too. The main advantage using camera processed JPGs holds over camera raw files is ease and convenience- processing raw files takes time and adds an additional step to any photo processing workflow. On top of that, camera raw files can be anywhere from two to ten times as large as the equivalent JPG, depending on the nonlossy compression scheme used in the specific file format. Fortunately, however, many cameras today have an option to produce a JPG, but also keep a copy of the raw file in case you want to play with it yourself. This way you can instantly get a useable, workable JPG file, but can also go back and process the raw later if you feel so inclined.
In the end, whether or not a picture looks good or not requires more than just raw processing and is completely subjective. Even so, raw processing can still be useful. I have to admit, I'm not particularly good at actually framing shots or whatnot, but at least I can make sure any flaws in my photos are my fault alone and not the result of automatic camera processing.
Labels:
Adventures,
APOD,
Art,
Friends,
Photos,
Photoshop/Illustrator
Subscribe to:
Posts (Atom)