Lately progress on my Takua Render project has slowed down a bit, since over this summer I am interning at Dreamworks Animation during weekdays. However, in the evenings and on weekends I am still been working at stuff!
Something that I never got around to doing for no particularly good reason was visualizing my KD-tree implementation. As such, I've known for a long time that my KD-tree is suboptimal, but have not actually been able to quickly determine to what degree my KD-tree is inefficient. However, since I now have a number of OpenGL based diagnostic views for Takua Render, I figured I no longer had a good excuse to not visualize my KD-tree. So last night I did just that! Here is what I got for the Stanford Dragon:
Just as I suspected, my KD-tree implementation was far from perfect. Some rough statistics I had my renderer output told me that even with the KD-tree, the renderer was still performing hundreds to even thousands of intersection tests against meshes. The above image explains why: each of those KD-tree leaf nodes are enormous, and therefore contain an enormous amount of objects!
Fortunately, after a bit of tinkering, I discovered that there's nothing actually wrong with the KD-tree implementation itself. Instead, the sparseness of the tree is coming from how I tuned the tree building operation. With a bit of tinkering, I managed to get a fairly improved tree:
...and with a bit more of tuning and playing with maximum recursion depths:
Previously, my KD-tree construction routine based the construction on only a maximum recursion depth; after the tree reached a certain height, the construction would stop. I've now modified the construction routine to use three separate criteria: a maximum recursion depth, minimum node bounding box volume, and a minimum number of objects per node. If any node meets any of the above three conditions, it is turned into a leaf node. As a result, I can now get extremely dense KD-trees that only have on average a low-single-digit number of objects per leaf node, as opposed to the average hundreds of objects per leaf node before:
In theory, this improvement should allow for a fairly significant speedup, since the number of intersections per mesh should now be dramatically lower, leading to much higher ray throughput! I'm currently running some benchmarks to determine just how much of a performance boost better KD-trees will give me, and I'll post about those results soon!
Saturday, June 16, 2012
Friday, May 25, 2012
New Photoblog!
I have a new photoblog!
Karl Has A Camera
Why start a photoblog when I already have this blog? Well, I originally started this blog as just a general catch-all blog for my projects, adventures, and such, but over the past year or so, this blog has evolved into a heavily computer-graphics projects focused blog, hence the name change from "Karu Blog" to "Code and Visuals" a while back. As such, I've decided to spin off my photos and adventuring into "Karl Has A Camera" in order to keep things more organized.
I'm going to keep my backup archive (explanation here) unified, but from now on, for my public facing stuff, "Code and Visuals" is for computer graphics projects and occasional doodles and art projects, and "Karl Has A Camera" is for photos and adventuring.
My first post on "Karl Has A Camera" is about East Nanjing Road in Shanghai!
Actually, this reminds me: I am currently also working on redesigning yiningkarlli.com and Likimmun, and also working on the waaaayyyy overdue Omjii relaunch. Those will all be coming soon!
We now return to our regularly scheduled computer graphics programming.
Karl Has A Camera
Why start a photoblog when I already have this blog? Well, I originally started this blog as just a general catch-all blog for my projects, adventures, and such, but over the past year or so, this blog has evolved into a heavily computer-graphics projects focused blog, hence the name change from "Karu Blog" to "Code and Visuals" a while back. As such, I've decided to spin off my photos and adventuring into "Karl Has A Camera" in order to keep things more organized.
I'm going to keep my backup archive (explanation here) unified, but from now on, for my public facing stuff, "Code and Visuals" is for computer graphics projects and occasional doodles and art projects, and "Karl Has A Camera" is for photos and adventuring.
My first post on "Karl Has A Camera" is about East Nanjing Road in Shanghai!
Actually, this reminds me: I am currently also working on redesigning yiningkarlli.com and Likimmun, and also working on the waaaayyyy overdue Omjii relaunch. Those will all be coming soon!
We now return to our regularly scheduled computer graphics programming.
Labels:
Announcements
Sunday, May 20, 2012
Subsurface Scattering and New Name
I implemented subsurface scattering in my renderer!
Here's a Stanford Dragon in a totally empty environment with just one light source providing illumination. The dragon is made up of a translucent purple jelly-like material, showing off the subsurface scattering effect:
Subsurface scattering is an important behavior that light exhibits upon hitting some translucent materials; normal transmissive materials will simply transport light through the material and out the other side, but subsurface scattering materials will attenuate and scatter light before releasing the light somewhere not necessarily along a line from the entry point. This is what gives skin and translucent fruit and marble and a whole host of other materials their distinctive look.
There are currently a whole host of methods to rapidly approximate subsurface scattering, including some screen-space techniques that are actually fast enough for use in realtime renderers. However, my implementation at the moment is purely brute-force monte-carlo; while extremely physically accurate, it is also very very slow. In my implementation, when a ray enters a subsurface scattering material, I generate a random scatter direction via isotropic scattering, and then calculate light accumulation attenuation based on an absorption coefficient defined for the material. This approach is very similar to the one taken by Peter and me in our GPU pathtracer.
At some point in the future I might try out a faster approximation method, but for the time being, I'm pretty happy with the visual result that brute-force monte-carlo scattering produces.
Here's the same subsurface scattering dragon from above, but now in the Cornell Box. Note the cool colored soft shadows beneath the dragon:
Also, I've finally settled on a name for my renderer project: Takua Render! So, that is what I shall be calling my renderer from now on!
Here's a Stanford Dragon in a totally empty environment with just one light source providing illumination. The dragon is made up of a translucent purple jelly-like material, showing off the subsurface scattering effect:
Subsurface scattering is an important behavior that light exhibits upon hitting some translucent materials; normal transmissive materials will simply transport light through the material and out the other side, but subsurface scattering materials will attenuate and scatter light before releasing the light somewhere not necessarily along a line from the entry point. This is what gives skin and translucent fruit and marble and a whole host of other materials their distinctive look.
There are currently a whole host of methods to rapidly approximate subsurface scattering, including some screen-space techniques that are actually fast enough for use in realtime renderers. However, my implementation at the moment is purely brute-force monte-carlo; while extremely physically accurate, it is also very very slow. In my implementation, when a ray enters a subsurface scattering material, I generate a random scatter direction via isotropic scattering, and then calculate light accumulation attenuation based on an absorption coefficient defined for the material. This approach is very similar to the one taken by Peter and me in our GPU pathtracer.
At some point in the future I might try out a faster approximation method, but for the time being, I'm pretty happy with the visual result that brute-force monte-carlo scattering produces.
Here's the same subsurface scattering dragon from above, but now in the Cornell Box. Note the cool colored soft shadows beneath the dragon:
Also, I've finally settled on a name for my renderer project: Takua Render! So, that is what I shall be calling my renderer from now on!
Labels:
Coding,
Pathtracer
Saturday, May 5, 2012
More Fun with Jello
At Joe's request, I made another jello video! Joe suggested I make a video that shows the simulation both in the actual simulator's GL view, and rendered out from Maya, so this video does just that. The starting portion of the video shows what the simulation looks like in the simulator GL view, and then shifts to the final render (done with Vray, my pathtracer still is not ready yet!). The GL and final render views don't quite line up with each other perfectly, but its close enough that you get the idea.
There is a slight change in the tech involved too- I've upgraded my jello simulator's spring array so that simulations should be more stable now. The change isn't terribly dramatic; all I did was add in more bend and shear springs in my simulation, so jello cubes now "try" harder to return to a perfect cube shape.
This video is making use of my Vray white-backdrop studio setup! The pitcher was just a quick 5 minute model, nothing terribly interesting there.
...and of course, some stills:


There is a slight change in the tech involved too- I've upgraded my jello simulator's spring array so that simulations should be more stable now. The change isn't terribly dramatic; all I did was add in more bend and shear springs in my simulation, so jello cubes now "try" harder to return to a perfect cube shape.
This video is making use of my Vray white-backdrop studio setup! The pitcher was just a quick 5 minute model, nothing terribly interesting there.
...and of course, some stills:


Smoke Sim + Volumetric Renderer
Something I've had on my list of things to do for a few weeks now is mashing up my volumetric renderer from CIS460 with my smoke simulator from CIS563.
Now I can cross that off of my list! Here is a 100x100x100 grid smoke simulation rendered out with pseudo Monte-Carlo black body lighting (described in my volumetric renderer post):
The actual approach I took to integrating the two was to simply pipeline them instead of actually merging the codebases. I added a small extension to the smoke simulator that lets it output the smoke grid to the same voxel file format that the volumetric renderer reads in, and then wrote a small Python script that just iterates over all voxel files in a folder and calls the volumetric renderer over and over again.
I'm actually not entirely happy with the render... I don't think I picked very good settings for the pseudo-black body, so a lot of the render is overexposed and too bright. I'll probably tinker with that some later and re-render the whole thing, but before I do that I want to move the volumetric renderer onto the GPU with CUDA. Even with multithreading via OpenMP, the rendertimes per frame are still too high for my liking... Anyway, here are some stills!

Now I can cross that off of my list! Here is a 100x100x100 grid smoke simulation rendered out with pseudo Monte-Carlo black body lighting (described in my volumetric renderer post):
The actual approach I took to integrating the two was to simply pipeline them instead of actually merging the codebases. I added a small extension to the smoke simulator that lets it output the smoke grid to the same voxel file format that the volumetric renderer reads in, and then wrote a small Python script that just iterates over all voxel files in a folder and calls the volumetric renderer over and over again.
I'm actually not entirely happy with the render... I don't think I picked very good settings for the pseudo-black body, so a lot of the render is overexposed and too bright. I'll probably tinker with that some later and re-render the whole thing, but before I do that I want to move the volumetric renderer onto the GPU with CUDA. Even with multithreading via OpenMP, the rendertimes per frame are still too high for my liking... Anyway, here are some stills!

Labels:
CIS560,
CIS563,
Coding,
Fluid Simulation
Monday, April 23, 2012
April 23rd CIS565 Progress Summary: Speed and Refraction
This post is the third update for the GPU Pathtracer project Peter and I are working on!
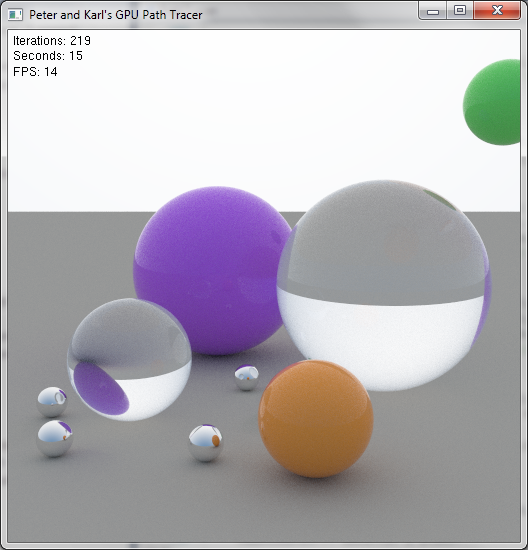
Over the past few weeks, the GPU Pathtracer has gained two huge improvements: refraction, and major speed gains! In just 15 seconds on Peter's NVIDIA GTX530 (on a more powerful card in the lab, we get even better speeds) , we can now get something like this:
Admittedly Peter has been contributing more interesting code than I have, which makes sense since in this project Peter is clearly the veteran rendering expert and I am the newcomer. But, I am learning a lot, and Peter is getting more cool stuff done since I can get other stuff done and out of the way!
The posts for this update are:
1. Performance Optimization: Speed boosts through zero-weight ray elimination
2. Cool Error Render: Fun debug images from getting refraction to work
3. Transmission: Glass spheres!
4: Fast Convergence: Tricks for getting more raw speed
As always, check the posts for details and images!
Labels:
CIS565,
Coding,
Collaborations,
Pathtracer
Saturday, April 14, 2012
April 14th CIS563 Progress Summary: Meshes and Meshes and Meshes
This post is the second update for the MultiFluids project!
The past week for Dan and me has been all about meshes: mesh loading, mesh interactions, and mesh reconstruction! We integrated in a OBJ to Signed Distance Field convertor, which allowed us to then implement liquid-against-mesh interactions and use meshes to define starting liquid positions. We also figured out how to run marching cubes on signed distance fields, allowing us to export OBJ mesh sequences of our fluid simulation and bring our sims into Maya for rendering!
Here is a really cool render from this week:
The posts for this week are:
1. Surface Reconstruction via Marching Cubes: Level set goes in, OBJ comes out
2. Mesh Interactions: Using meshes as interactable objects
3. Meshes as Starting Liquid Volumes and Maya Integration: Cool tests with a liquid Stanford Dragon
Check out the posts for details, images, and videos!
The past week for Dan and me has been all about meshes: mesh loading, mesh interactions, and mesh reconstruction! We integrated in a OBJ to Signed Distance Field convertor, which allowed us to then implement liquid-against-mesh interactions and use meshes to define starting liquid positions. We also figured out how to run marching cubes on signed distance fields, allowing us to export OBJ mesh sequences of our fluid simulation and bring our sims into Maya for rendering!
Here is a really cool render from this week:
The posts for this week are:
1. Surface Reconstruction via Marching Cubes: Level set goes in, OBJ comes out
2. Mesh Interactions: Using meshes as interactable objects
3. Meshes as Starting Liquid Volumes and Maya Integration: Cool tests with a liquid Stanford Dragon
Check out the posts for details, images, and videos!
Labels:
CIS563,
Coding,
Collaborations,
Fluid Simulation
Thursday, April 5, 2012
April 5th CIS565 Progress Summary: Interactivity, Alpha Review, Fresnel Reflections, Antialiasing
This post is the second update for the GPU Pathtracer project!
Since the last update, Peter and I added an interactive camera to the renderer to allow realtime movement around the scene! We also had our Alpha Review, which went quite well, and Peter implemented a reflection model. Initially the reflection model used was Schlick's Approximation, but later Peter replaced that with the full Fresnel equations. I also added super-sampled anti-aliasing for a smoother image.
The posts for this update:
1. Interactivity and Moveable Camera: We can move around the scene!
2. Alpha Review Presentation: Slides and other stuff from our Alpha Review
3. Specular Reflection Test: The first test with Shlick's Approximation
4. Fresnel Reflections: Some details on our reflection model
5. Abstract Art: Some fun buggy renders Peter produced while debugging
6. Anti-Aliasing: Super-sampled anti-aliasing!
A nice image from the last post:
Since the last update, Peter and I added an interactive camera to the renderer to allow realtime movement around the scene! We also had our Alpha Review, which went quite well, and Peter implemented a reflection model. Initially the reflection model used was Schlick's Approximation, but later Peter replaced that with the full Fresnel equations. I also added super-sampled anti-aliasing for a smoother image.
The posts for this update:
1. Interactivity and Moveable Camera: We can move around the scene!
2. Alpha Review Presentation: Slides and other stuff from our Alpha Review
3. Specular Reflection Test: The first test with Shlick's Approximation
4. Fresnel Reflections: Some details on our reflection model
5. Abstract Art: Some fun buggy renders Peter produced while debugging
6. Anti-Aliasing: Super-sampled anti-aliasing!
A nice image from the last post:
Check the posts for tons of details, images, and even some video!
Labels:
CIS565,
Coding,
Collaborations,
Pathtracer
Sunday, April 1, 2012
April 1st CIS563 Progress Summary: Framework Improvements and Bounding Volumes
Here's the first progress update/blog digest for the MultiFluids project!
Dan and I started by taking our starting framework and tearing it down to its core. We then rebuilt the base code up with our own custom additions, leaving just the core solver intact. From there, we started building some of the basic features our project will require!
Here are the posts for this update:
1. Framework Improvements and Particles with Properties: Tearing the base code down to the ground and rebuilding it better, faster, and with more features
2. Bounding Volumes & Lesson 1: Don't just assume base code is perfect: Dan discovers some flaws in the base code!
3. Multiple Arbitrary Bounding Volumes: All-important object interaction
A frame from one of our test videos:
Check the posts for details and videos!
Dan and I started by taking our starting framework and tearing it down to its core. We then rebuilt the base code up with our own custom additions, leaving just the core solver intact. From there, we started building some of the basic features our project will require!
Here are the posts for this update:
1. Framework Improvements and Particles with Properties: Tearing the base code down to the ground and rebuilding it better, faster, and with more features
2. Bounding Volumes & Lesson 1: Don't just assume base code is perfect: Dan discovers some flaws in the base code!
3. Multiple Arbitrary Bounding Volumes: All-important object interaction
A frame from one of our test videos:
Check the posts for details and videos!
Labels:
CIS563,
Coding,
Collaborations,
Fluid Simulation
April 1st CIS565 Progress Summary: Camera and Pathtracing
Here's the first progress summary/blog digest for the GPU Pathtracer project!
Over the past few days, Peter and I established our framework, got random number generation working on the GPU, built an accumulator, figured out parallelized camera ray projection, got spherical intersection tests working, and got a basic path-traced image!
Here are the posts for this update:
1. Random Number Generation: Fun with parallelized random number generators and seeding
2. First Rays on the GPU: Parallel raycasting!
3. Accumulating Iterations: The heart of any monte-carlo based renderer
4. We Have Path Tracing: First working renders!
Here's an image from our very first working render! More soon!
Over the past few days, Peter and I established our framework, got random number generation working on the GPU, built an accumulator, figured out parallelized camera ray projection, got spherical intersection tests working, and got a basic path-traced image!
Here are the posts for this update:
1. Random Number Generation: Fun with parallelized random number generators and seeding
2. First Rays on the GPU: Parallel raycasting!
3. Accumulating Iterations: The heart of any monte-carlo based renderer
4. We Have Path Tracing: First working renders!
Here's an image from our very first working render! More soon!
Labels:
CIS565,
Coding,
Collaborations,
Pathtracer
Tuesday, March 27, 2012
CIS563/CIS565 Final Project Github Repos!
For both MultiFluids and the GPU Pathtracer, we will be making our source code accessibly to all on Github!
Of course commercial coding projects and whatnot have very good reasons for keeping their source code locked down and proprietary, but open source is something I very strongly believe in. Open code allows other people to see what one does and give feedback and suggestions for improvement, and also allows other people interested in similar projects to potentially learn and build off of. Everybody wins!
The MultiFluids repository can be found here: https://github.com/betajippity/MultiFluids
The GPU Pathtracer repository can be found here: https://github.com/peterkutz/GPUPathTracer/
...and of course, the relevant blog posts:
GPU Pathtracer: http://gpupathtracer.blogspot.com/2012/03/github-repository.html
MultiFluids: http://chocolatefudgesyrup.blogspot.com/2012/03/github-and-windowsosx.html
GPU Pathtracer: http://gpupathtracer.blogspot.com/2012/03/github-repository.html
MultiFluids: http://chocolatefudgesyrup.blogspot.com/2012/03/github-and-windowsosx.html
Labels:
CIS563,
CIS565,
Coding,
Collaborations,
Fluid Simulation,
Pathtracer
Monday, March 19, 2012
CIS563/CIS565 Final Projects: Multiple Interacting Fluids and GPU Pathtracing
Over the next month and a half, I will be working on a pair of final projects for two of my classes, CIS565 (GPU Programming, taught by Patrick Cozzi), and CIS563 (Physically Based Animation, taught by Joe Kider).
For CIS563, I will be teaming up with my fellow classmate and good friend Dan Knowlton to develop a liquid fluid simulator capable of simulating multiple fluids interacting against each other. Dan is without a doubt one of the best in our class and easily my equal or superior in all things graphics, so working with him should be a lot of fun. Our project is going to be based primarily on the paper Multiple Interacting Fluids by Losasso et. al. and as a starting point we will be using Chris Batty's Fluid 3D framework.
For CIS565, I will be working with my fellow Pixarian and friend Peter Kutz, who is somewhat of a physically based rendering titan at Penn. Working with Peter should be a very interesting and exciting learning experience. Peter and I will be developing a CUDA based GPU Pathtracer with the goal of generating convincing photorealistic images extremely rapidly. We will be developing our GPU pathtracer from scratch, although we will obviously draw inspiration from both Peter's Photorealizer project and my own CPU pathtracer project.
For both projects, we will be keeping blogs where we will post development updates, so I won't post too much about development details to this here personal blog. Instead, I'm thinking about posting a weekly digest of progress on both projects with links to interesting highlights on the project blogs.
Dan and I will be blogging at http://chocolatefudgesyrup.blogspot.com/. We've titled our project "Chocolate Syrup" for two reasons: firstly, Dan likes to codename his project with types of confectionaries, and secondly, chocolate syrup is one type of highly viscous fluid we aim for our simulator to be able to handle!
Peter and I will be blogging at http://gpupathtracer.blogspot.com/. For now we have decided to call our project "Peter and Karl's GPU Pathtracer", for obvious reasons.
Details for each project can be found in the first post of each blog, which are the project proposals.
Multiple Interacting Fluids Proposal: http://chocolatefudgesyrup.blogspot.com/2012/03/project-proposal.html
GPU Pathtracer Proposal: http://gpupathtracer.blogspot.com/2012/03/project-proposal.html
Both of these projects should be very very cool, and I'll be posting often to both development blogs!
Labels:
CIS563,
CIS565,
Coding,
Collaborations,
Fluid Simulation,
Pathtracer
Monday, March 12, 2012
Pathtracer with KD-Tree
I have finished my KD-Tree rewrite! My new KD-Tree implements the Surface-Area Heuristic for finding optimal splitting planes, and stops splitting once a node has either reached a certain sufficiently small surface area, or has a sufficiently small number of elements contained within itself. Basically, very standard KD-Tree stuff, but this time, properly implemented.
As a result, I can now render meshes much quicker than before.
Here's a cow in a Cornell Box. Each iteration of the cow took about 3 minutes, which is a huge improvement over my old raytracer, but still leaves a lot of room for improvement:
...and of course, the obligatory Stanford Dragon test. Each iteration took about 4 minutes for both of these images (the second one I let converge for a bit longer than the first one), and I made these renders a bit larger than the cow one:
So! Of course the KD-Tree could still use even more work, but for now it works well enough that I think I'm going to start focusing on other things, such as more interesting BSDFs and other performance enhancements.
Here's a cow in a Cornell Box. Each iteration of the cow took about 3 minutes, which is a huge improvement over my old raytracer, but still leaves a lot of room for improvement:
...and of course, the obligatory Stanford Dragon test. Each iteration took about 4 minutes for both of these images (the second one I let converge for a bit longer than the first one), and I made these renders a bit larger than the cow one:
So! Of course the KD-Tree could still use even more work, but for now it works well enough that I think I'm going to start focusing on other things, such as more interesting BSDFs and other performance enhancements.
Labels:
Coding,
Pathtracer,
Raytracer
Sunday, March 11, 2012
First Pathtraced Image!
Behold, the very first image produced using my pathtracer!
Granted, the actual image is not terribly interesting- just a cube inside of a standard Cornell box type setup, but it was rendered entirely using my own pathtracer! Aside from being converted from a BMP file to a PNG, this render has not been modified in any way whatsoever outside of my renderer (I have yet to name it). This render is the result of a thousand iterations. Here are some comparisons of the variance in the render at various iteration levels (click through to the full size versions to get an actual sense of the variance levels):
Each iteration took about 15 seconds to finish.
Unfortunately, I have not been able to move as quickly with this project as I would like, due to other schoolwork and TAing for CIS277. Nonetheless, here's where I am right now:
Currently the renderer is in a very very basic primitive state. Instead of extending my raytracer, I've opted for a completely from scratch start. The only piece of code brought over from the raytracer was the OBJ mesh system I wrote, since that was written to be fairly modular anyway. Right now my pathtracer works entirely through indirect lighting and only supports diffuse surfaces... like I said, very basic! Adding direct lighting should speed up render convergence, especially for scenes with small light sources. Also, right now the pathtracer only uses single direction pathtracing from the camera into the scene... adding bidirectional pathtracing should lead to another performance boost.
I'm still working on rewriting my KD-tree system, that should be finished within the next few days.
Something that is fairly high on my list of things to do right now is redesign the architecture for my renderer... right now, for each iteration, the renderer traces a path through a pixel all the way to its recursion depth before moving on to the next pixel. As soon as possible I want to move the renderer to use an iterative (as opposed to recursive) accumulated approach for each iteration (slightly confusing terminology, here i mean iteration as in each render pass), which, oddly enough, is something that my old raytracer already does. I've already started moving towards the accumulated approach; right now, I store the first set of raycasts from the camera and reuse those rays in each iteration.
One cool thing that storing the initial ray cast allows me to do is to generate a z-depth version of the render for "free":
Okay, hopefully by my next post I'll have the KD-tree rewrite done!
Granted, the actual image is not terribly interesting- just a cube inside of a standard Cornell box type setup, but it was rendered entirely using my own pathtracer! Aside from being converted from a BMP file to a PNG, this render has not been modified in any way whatsoever outside of my renderer (I have yet to name it). This render is the result of a thousand iterations. Here are some comparisons of the variance in the render at various iteration levels (click through to the full size versions to get an actual sense of the variance levels):
![]() |
| Upper Left: 1 iteration. Upper Right: 5 iterations. Lower Left: 10 iterations. Lower Right: 15 iterations. |
![]() |
| Upper Left: 1 iteration. Upper Right: 250 iterations. Lower Left: 500 iterations. Lower Right: 750 iterations. |
Each iteration took about 15 seconds to finish.
Unfortunately, I have not been able to move as quickly with this project as I would like, due to other schoolwork and TAing for CIS277. Nonetheless, here's where I am right now:
Currently the renderer is in a very very basic primitive state. Instead of extending my raytracer, I've opted for a completely from scratch start. The only piece of code brought over from the raytracer was the OBJ mesh system I wrote, since that was written to be fairly modular anyway. Right now my pathtracer works entirely through indirect lighting and only supports diffuse surfaces... like I said, very basic! Adding direct lighting should speed up render convergence, especially for scenes with small light sources. Also, right now the pathtracer only uses single direction pathtracing from the camera into the scene... adding bidirectional pathtracing should lead to another performance boost.
I'm still working on rewriting my KD-tree system, that should be finished within the next few days.
Something that is fairly high on my list of things to do right now is redesign the architecture for my renderer... right now, for each iteration, the renderer traces a path through a pixel all the way to its recursion depth before moving on to the next pixel. As soon as possible I want to move the renderer to use an iterative (as opposed to recursive) accumulated approach for each iteration (slightly confusing terminology, here i mean iteration as in each render pass), which, oddly enough, is something that my old raytracer already does. I've already started moving towards the accumulated approach; right now, I store the first set of raycasts from the camera and reuse those rays in each iteration.
One cool thing that storing the initial ray cast allows me to do is to generate a z-depth version of the render for "free":
Okay, hopefully by my next post I'll have the KD-tree rewrite done!
Labels:
Coding,
Pathtracer,
Raytracer
Wednesday, March 7, 2012
Smoke Sim: Preconditioning and Huge Grids
I have added preconditioning to my smoke simulator! For the preconditioner, I am using Incomplete Cholesky, which is the preconditioner recommended in chapter 4 of the Bridson Fluid Course Notes. I've also troubleshooted by vorticity implementation, so the simulation should produce more interesting/stable vortices now.
The key reason for implementing the preconditioner is simple: speed. With a faster convergence comes an added bonus: being able to do larger grids due to less time required per solve. Because of that speed increase, I can now run my simulations on 3D grids.
In previous years, the CIS563 smoke simulator framework usually hit a performance cliff at grids beyond around 50x50x50, but last year Peter Kutz managed to push his smoke simulator to 90x90x36 by implementing a sparse A-Matrix structure, as opposed to storing every single data point, including empty ones, for the grid. This year's smoke simulation framework was updated to include some of Peter's improvements, and so Joe reckons that we should be able to push our smoke simulation grids pretty far. I've been scaling up starting from 10x10x10, and now I'm at 100x100x50:
This simulation took about 24 hours to run on a 2008 MacBook Pro with a 2.8 Ghz Core 2 Duo, but that is actually pretty good for fluid simulation! According to my rather un-scientific estimates, the simulation would take about 4 or 5 days without the preconditioner, and even longer without the sparse A-Matrix. I bet I can still push this further, and I'm starting to think about multithreading the simulation with OpenMP to get even more performance and even larger grids. We shall see.
One more thing: rendering this thing. So far I have not been doing any fancy rendering, just using the default OpenGL render that our framework came with. However, I want to get this into my volumetric renderer at some point and maybe even try out the pseudo-black body stuff with it. Eventually I want to try rendering this out with my pathtracer too!
Labels:
CIS563,
Coding,
Fluid Simulation
Subscribe to:
Posts (Atom)